Showing posts with label homeschool. Show all posts

Monday, February 8, 2016

Baxter's PAW-lor Trick with Uncle Pete

Artwork by Jaime D. Buckley
Children’s books are so much more than just books. Books provide time for togetherness with a read-aloud. Books are a strong avenue for language development. 
Books are also a springboard for educational activities.

The key is to make the activities fun and to make the activities memorable.
The characters, storyline, and theme of Pickled Pumpkin Pie by deb troehler (link) and 
Jaime D. Buckley (link) definitely provide all of the above-listed opportunities.

When I was creating the follow-up activities for the story, I kept going back to the idea of a whole pie. Soon, that morphed into a HOLE in the pie—which lead to an activity that I used to do with my students. The activity below teaches children not only the difference between circumference and area. But it also helps children expand their minds and think outside the box
—Or, more appropriately, to think INSIDE the pie crust.

At first, Baxter kept thinking about the edge of the pie—or the circumference.
However, he soon figured it out.

The images below are useful for teaching children to cut a hole large enough in a circle to climb through it.

This post was shared on Create-with-Joy. Please check them out.

This post was shared on The Squishable Baby. Please check them out.


Monday, November 11, 2013

PUT ON YOUR THINKING CAPS WITH HANDS-ON LEARNING


Today is all about my favorite veteran, my sailor husband. I am thankful for the time and devotion that so many who have proudly served our country gave to protect our freedoms and our loved ones.
Therefore, my post today is an early rendition of Thanksgiving leftovers. I am reposting an earlier post for preschool through first grade with a link to a free printable PDF.
THANK YOU TO ALL THAT HAVE SERVED OUR COUNTRY.
In a time when budgets are trimmed, dollars are stretched, and educators are forever expected to do more with less, sometimes it helps to tap into free resources to add to your curriculum materials.


Today’s post is not actually an activity—the post is how to use a FREE resource to teach and reinforce many concepts in your classroom. With a little help from your students, you can quickly fill a tub with these handy dandy manipulatives and therefore have the materials necessary for countless center ideas.
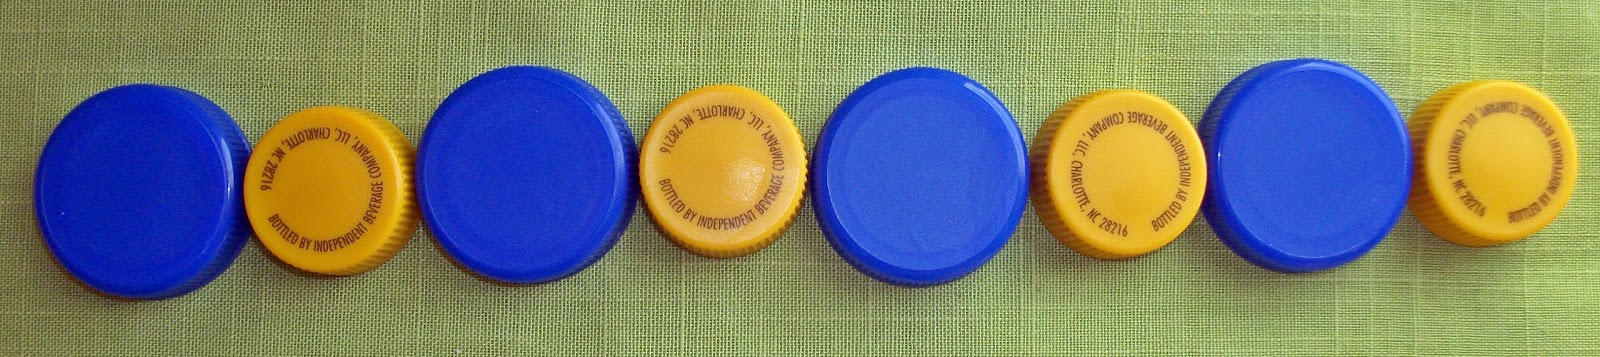
This resource of simple lids saved from common household objects can be used to teach many concepts at the preschool and primary levels. These activities can be used in a guided lesson or as a center activity.

MATERIALS:
Assorted plastic caps in multiple colors and sizes
Printout shown (optional)
 

LINK TO FREE PDF ON TEACHERS PAY TEACHERS


INSTRUCTIONS:
1. Prior to using the tub of caps, assign your students the task of collecting clean plastic lids from home.
2. Create printouts of image provided to accompany the tub of caps.
3. Put on your own thinking cap and see how many ways you can use this FREE resource with your children. Here are just a few of the possibilities:
COLOR SORTING
COMPARING BY SIZE
ORDERING BY SIZE
IDENTIFYING ORDINALS
CREATING AND EXTENDING PATTERNS
CREATING NUMBER SENTENCES
PRACTICING FINE MOTOR SKILLS
SORTING BY SHAPE

What concepts can you teach with this resource?

This post has been shared on the following blogs. Please check them out:

Living Well Spending Less dot Com


Monday, October 7, 2013

CANDY CORN or CORNY DUCKS~HOW TO FIND THE RIGHT BALANCE


Whether you teach in a public school, a private school, or homeschool, one of the challenges you face is finding the right balance to your educational endeavors. If you drill, drill, and drill some more, your children may tune out and are less likely to retain the valuable information and skills that you address. However, if the day is filled with nothing but fun and games, your children may miss out on practicing skills and internalizing much-needed information. How, then, do you strike that perfect balance?
One way is to involve your students as much as possible in the learning process. As you teach, keep communication lines open. Ask questions and answer their questions. Discuss how the skills they are practicing and the knowledge they are acquiring will transfer to other areas.
If we as educators begin this technique with children at a young age and provide meaningful lessons and activities, then our efforts will help raise children that are thinkers, doers, and problem solvers.

In an effort to help find balance, today’s activity will encourage your children to learn concepts and transfer those concepts to real-life situations. In a nutshell (or cornhusk), the activity will encourage your children to think, solve problems, and have fun while doing it.
CANDY CORN OR CORNY DUCKS—HOW TO FIND THE RIGHT BALANCE
This activity consists of 2 components—creating a balance from household items and using that balance to teach and practice the concept of more and less as well as making predictions.

Grade Range: K – 2
Time to complete: 30-45 minutes
VA STANDARDS of LEARNING: Math K.2; K.8; 1.9
COMMON CORE STATE STANDARDS: CCSS.Math.K.CC.B.5; CCSS.Math.K.CC.A.3; CCSS.Math.2.OA.C.4

ACTIVITY DESCRIPTION: Students will place objects on a balance in order to compare the mass of those objects. They will count the pieces needed to move the balance pivot point to the middle. They will then make predictions on doubling or tripling those items and use the objects to determine if their predictions were correct. Students will then create number sentences to represent their findings.
PLEASE NOTE: The balance created and the balance purchased from an internet source are not devices that present truly accurate readings. They are suitable for demonstrating the concept of more, less, or the same.

MATERIALS:

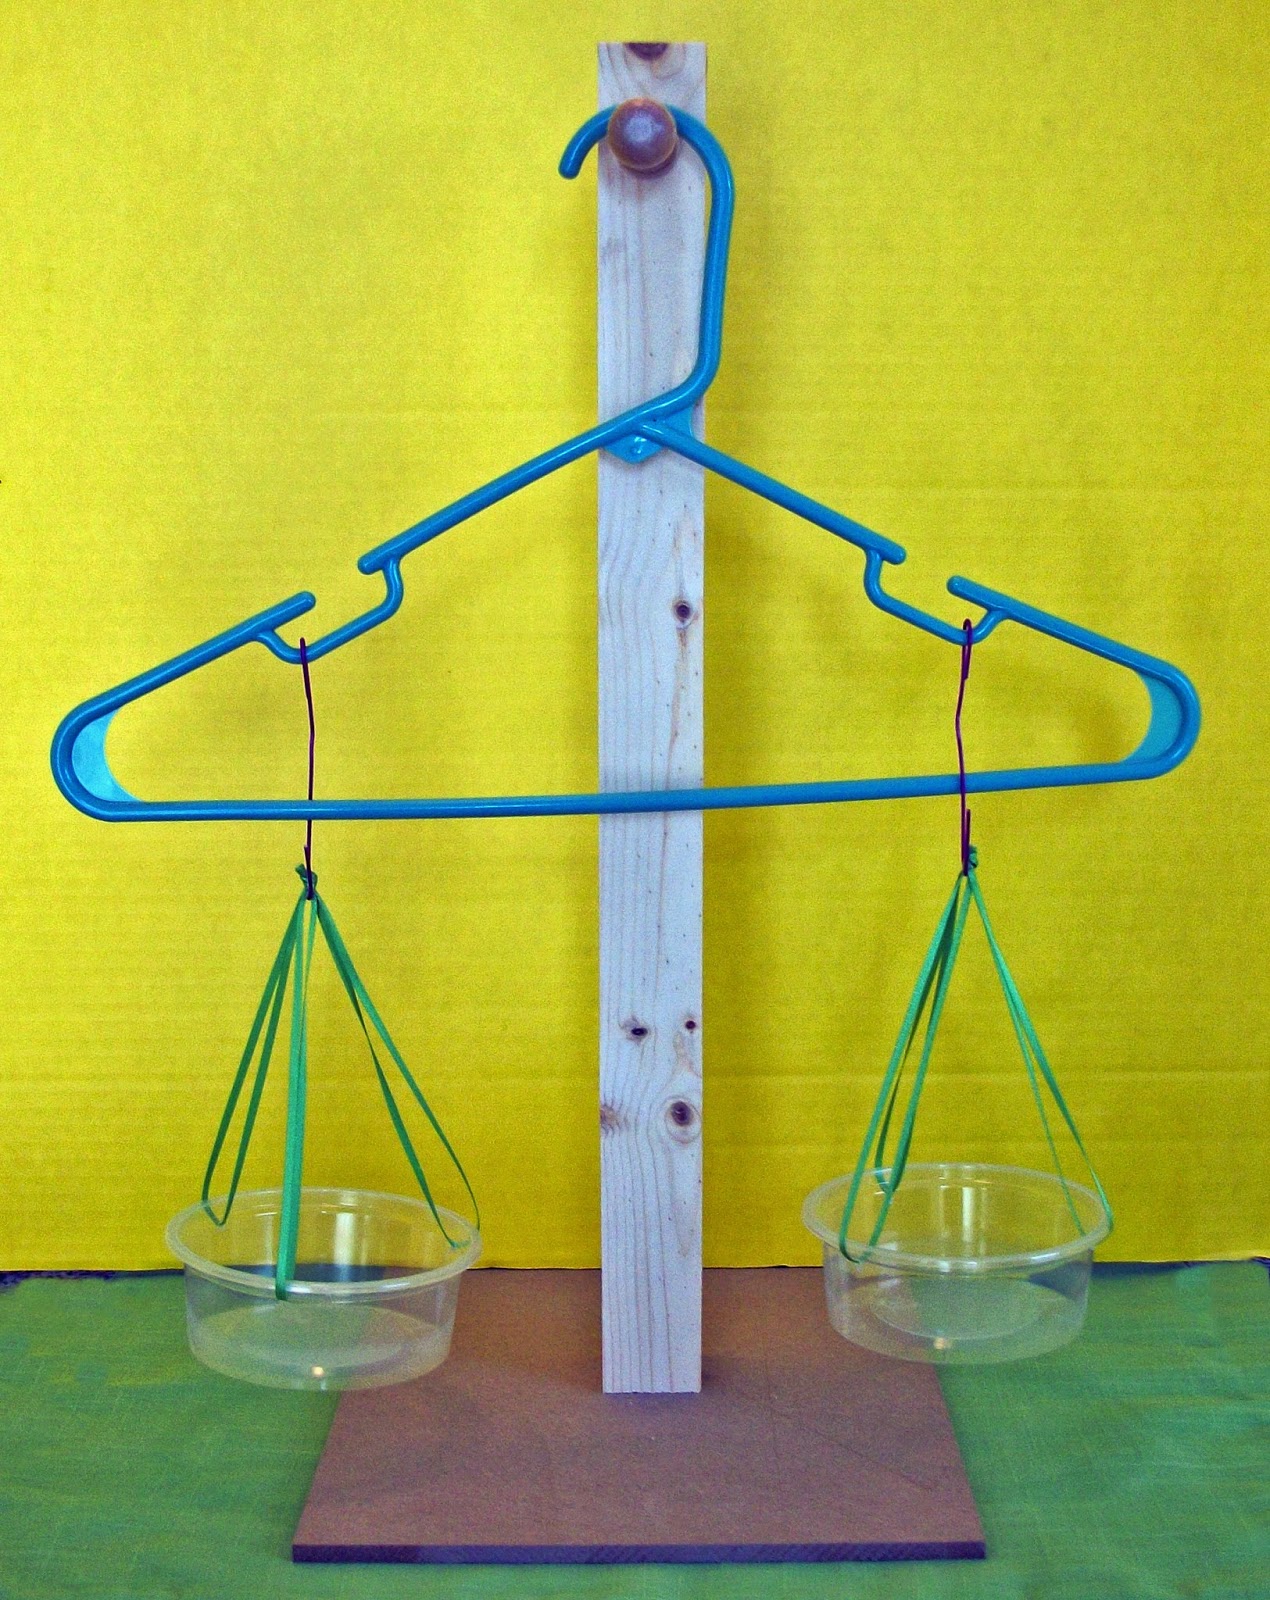
MATERIALS NEEDED TO CREATE HANGER BALANCE:
Plastic hanger with hook loops
2 clear plastic containers or cups
2 paper clips
Ribbon
Hole puncher
Scissors
Ruler
Fiber board base: 2 x 2 piece of wood, hat hanger dowel, nails (OR hang the balance on a
doorknob)*

MATERIALS NEEDED TO COMPLETE THE ACTIVITY:
Set of October-themed objects (rubber ducks used for demonstration)
Candy corn and pumpkins
Small can of corn Pencil
Worksheets (provided)
Balance: Either hanger balance or balance from a retail source


INSTRUCTIONS:
Hint: The creation of the hanger balance can either be conducted as a class project or prior to completing the counting and balancing activity. Due to the small parts of the balance, it is recommended to create the balance prior to the activity for children under the age of 6.

MAKING THE HANGER BALANCE:
For best results, this balance can be used to compare objects that are less than 1 lb. in weight.
1. Using the hole punch, make 3 holes near the top of each plastic container, placing the holes equal distances apart, as shown.

2. Cut 6 lengths of ribbon that are 15 inches long, as shown.
 3. Thread the ribbon through the holes in one of the containers, as shown.

4. Align all 6 ends of the ribbon and tie them into a single knot. This knot will be used to hang the container on the paper clips at each end of the balance.
5. Repeat for the second container.
6. Open both paper clips so that one end is still bent. Bend the straight end over each end of the hanger. 
 *7 Door Knob Pivot Point: If you use a doorknob as the pivot point, your balance is finished. When in use, place the knots of the ribbons onto the paper clips AFTER adding the items to be balanced.

*7. Base Pivot Point:
A. To create the base nail or screw the 12” by 12” fiber board to the end of the 2’ x 2”.
B. Screw the hat hook onto the top of the 2 x 2” leaving approximately 1” as a buffer.

 
HOW MUCH CANDY CORN DOES IS THE SAME AS REAL CORN?

This activity is contains suggested uses for the classroom balance. Modify the instructions to meet the needs of your children.
 
1. Prior to conducting the activity, demonstrate what a balance does and how it works. As this activity involves using candy corn, one suggestion is to divide the class into 2 groups and assign a side of the balance to each group. Then pour a small bag of candy corn into the balance reservoir.
Ask: Do you think this is a fair way to divide the candy corn? How could we do this better without actually counting out ALL of the candy corn?
Then move some of the candy corn into the empty reservoir until the balance pivot point is in the middle.
2. Tell the students that they will use candy corn as a unit of measure to discover how many pieces of candy corn have the same mass (stuff)* as those objects.
A. Place a small can of corn into the balance reservoir.
B. Have the students predict how much candy corn it would take to equal the same mass (stuff) as the can of corn. Count the pieces and place them in front of the balance. Record their prediction.

C. Slowly add the candy corn to the empty reservoir.


D. If their prediction was too low, add more candy corn one-at-a-time until the reservoirs are the same level. If their prediction was too high, remove the candy corn one-at-a-time until the reservoirs are balanced. Record the final count.
3. Repeat the process using candy pumpkins and candy corn, rubber ducks and candy corn, etc.

 4. Extend the learning: This activity is great for addressing multiplication, counting on, ratios, etc.


TRANSFER THOSE SKILLS WITH BALANCE ON THE PLAYGROUND: If you are lucky enough to have access to a see saw, then apply the skills approached in the activity to balancing students. This is a great opportunity to springboard into a discussion of simple machines.


OR...
POST A COMMENT ON THIS BLOG**

*This giveaway will include the balance shown above for parents and teachers of children over the age of 4. The registration will last from the posting of this blog post until midnight, October 20, 2013. One winner will be randomly selected from the entries. The balance will be shipped from Amazon within approximately 2 weeks following the close of the giveaway. The giveaway is open to residents of the United States with a United State’s mailing address. The winner’s name will be posted on the blog, unless the winner chooses not to have his/her name posted.
**To be considered for entry into this giveaway, the entrant’s email address must be submitted to the blog administrator.

THIS POST HAS BEEN SHARED ON THE FOLLOWING BLOGS. PLEASE CHECK THEM OUT:

Kids Activities Blog dot Com

The Mom Maven dot Com

The HomeSchool Village dot Com

No Time for Flash Cards dot Com


BALANCE GIVEAWAY UPDATE, OCT. 21, 2013:

Congratulations to Berdine from FL, the winner of the balance and educational treat. I hope your little ones have fun with them.

Thank you to all that entered this giveaway. Please check back in early November for a very special giveaway.


Wednesday, August 14, 2013

HOW CAN YOU MAKE A WHOLE HOLE?


It’s official.
It’s here.
The 2013 school year!
Whether you’re a mom of preschool-aged children, a homeschool parent, or a teacher in a public or private school, you knew the coming of the first day of school was inevitable. Over the next 10 months you will guide, inspire, encourage, and applaud the growth of the students in your care.

As you and your children embark on the educational adventure together, it is important to use the everything-you’ve-got approach to help assure the success of your children and their educational experience.
Today’s resource is not as much about the end product as it is the path taken to obtain the end product. Completing the activity will help each of us take a closer look at how we solve problems. An understanding of how we approach a task or challenge is, indeed, useful information that will help with educational planning.

So, put on your thinking cap (No, wait, that’s the next blog post scheduled a couple weeks from now!), relax, and take time to study the challenge, and complete today’s activity.
HOW CAN YOU MAKE A WHOLE HOLE?

How can you create a hole in an 8 1/2 x 11 piece of paper that is large enough to climb through?

Pushing your hand through it won’t work.
 
Forcing your foot through it won’t work.
 
If those methods don’t work, then reread the second paragraph of this post for a hint—use everything-you’ve-got!
USE ALL OF THIS!
Do you still need some help?
In a nutshell, or paper hole, this activity is a reminder of some of the many things necessary for a successful school year to take place.

1. Remember to use as many resources available as possible.
2. Remember to relax—our minds are better prepared to tap into our creativity when we are calm.
3. Achieving success takes time. Children master skills at different rates. Adjust for this.
4. Turning bigger goals into several smaller goals helps assure success.
5. Approach challenges from more than one direction.
6. When we teach children, we must remember that everyone needs help from time to time. If you can’t determine the best way to help a child master a skill, possibly a colleague, friend, or even a student can devise a teaching strategy that will work.

Remember that you have a whole year ahead of you. Next spring you will look back on this month and wonder why you were the least bit apprehensive about SY 2013-2014.
That being said, grab your scissors and use this photo tutorial as a way to grab your students’ attention this year. How many students can fit through a hole in an 8 1/2” by 11” piece of paper?


THINK: HOW DO I USE AS MUCH SURFACE AS POSSIBLE?


Sunday, August 4, 2013

HOW TO CREATE A MINI-BOOKLET


It’s August! Summer activities are winding down. Preparations for the fall routine are winding up. If you’re like many parents, teachers, or homeschool co-op coordinators, you are probably being bombarded with educational ideas and resources. Basically, the very things meant to make education planning easier are having the opposite effect.
With the over-the-top school whirlwind in mind, this month will be light on posts, light on ideas, and light on materials. The only resource used—paper.
Paper is truly a wonderful resource:
It’s readily available.
It’s fairly inexpensive.
It’s incredibly versatile.
The idea for today is how to use a single sheet of paper to organize, retell, sequence, and review—all in one handy dandy pocket-sized mini-booklet.
HOW TO CREATE A MINI-BOOKLET

While this paper-based resource is not new, in our techno-gadget society, many of us have forgotten how utterly simple and amazingly useful paper is. Your children, students, and maybe even you will find this 8.5 x 11 creation a terrific alternative to tablets and computer screens.

MATERIALS:
A piece of blank paper (8.5 x 11 used for demonstration)
Scissors
INSTRUCTIONS:
Hint: The numbers were added to aid in the visual portion of the instructions.

1. Fold the paper in half, horizontally, scoring the fold with your fingernail. (2 sections created)
 
2. Fold the paper again, vertically, scoring the fold with your fingernail. (4 sections created)

3. Fold the paper again, vertically, scoring the fold with your fingernail. (8 sections created)
 
4. Open the paper to reveal the scored fold lines.

5. Refold the paper, horizontally, as in step 1. This will leave 4.25 x 11 strip of paper with 3 scored lines and 4 sections of paper, as shown. 

6. Using scissors cut the paper on the fold line between the first and third scored lines, as shown.
 
7. Carefully open the paper pulling the 2 middle score lines apart until the sections meet in the middle creation 4 individual sections, as shown.
 
8. Fold the paper into the finished booklet, as shown.
 
The finished product is mini-booklet with a cover and 6 interior pages.