Showing posts with label addition. Show all posts

Monday, March 10, 2014

RAINBOW Fun for St. Patrick's Day

Here on the east coast, the winter has definitely been long. Students in our area missed nearly 3 weeks of school due to snow, ice, wind—you name it. That’s why I am especially looking forward to St. Patrick’s Day this year. The holiday doesn’t always attract much attention. However, with the sea of green from a St. Patty's Parade and the rainbows that signal the end of a storm, St. Patrick’s Day seems to be the perfect holiday to usher in a spring-thinking state of mind.

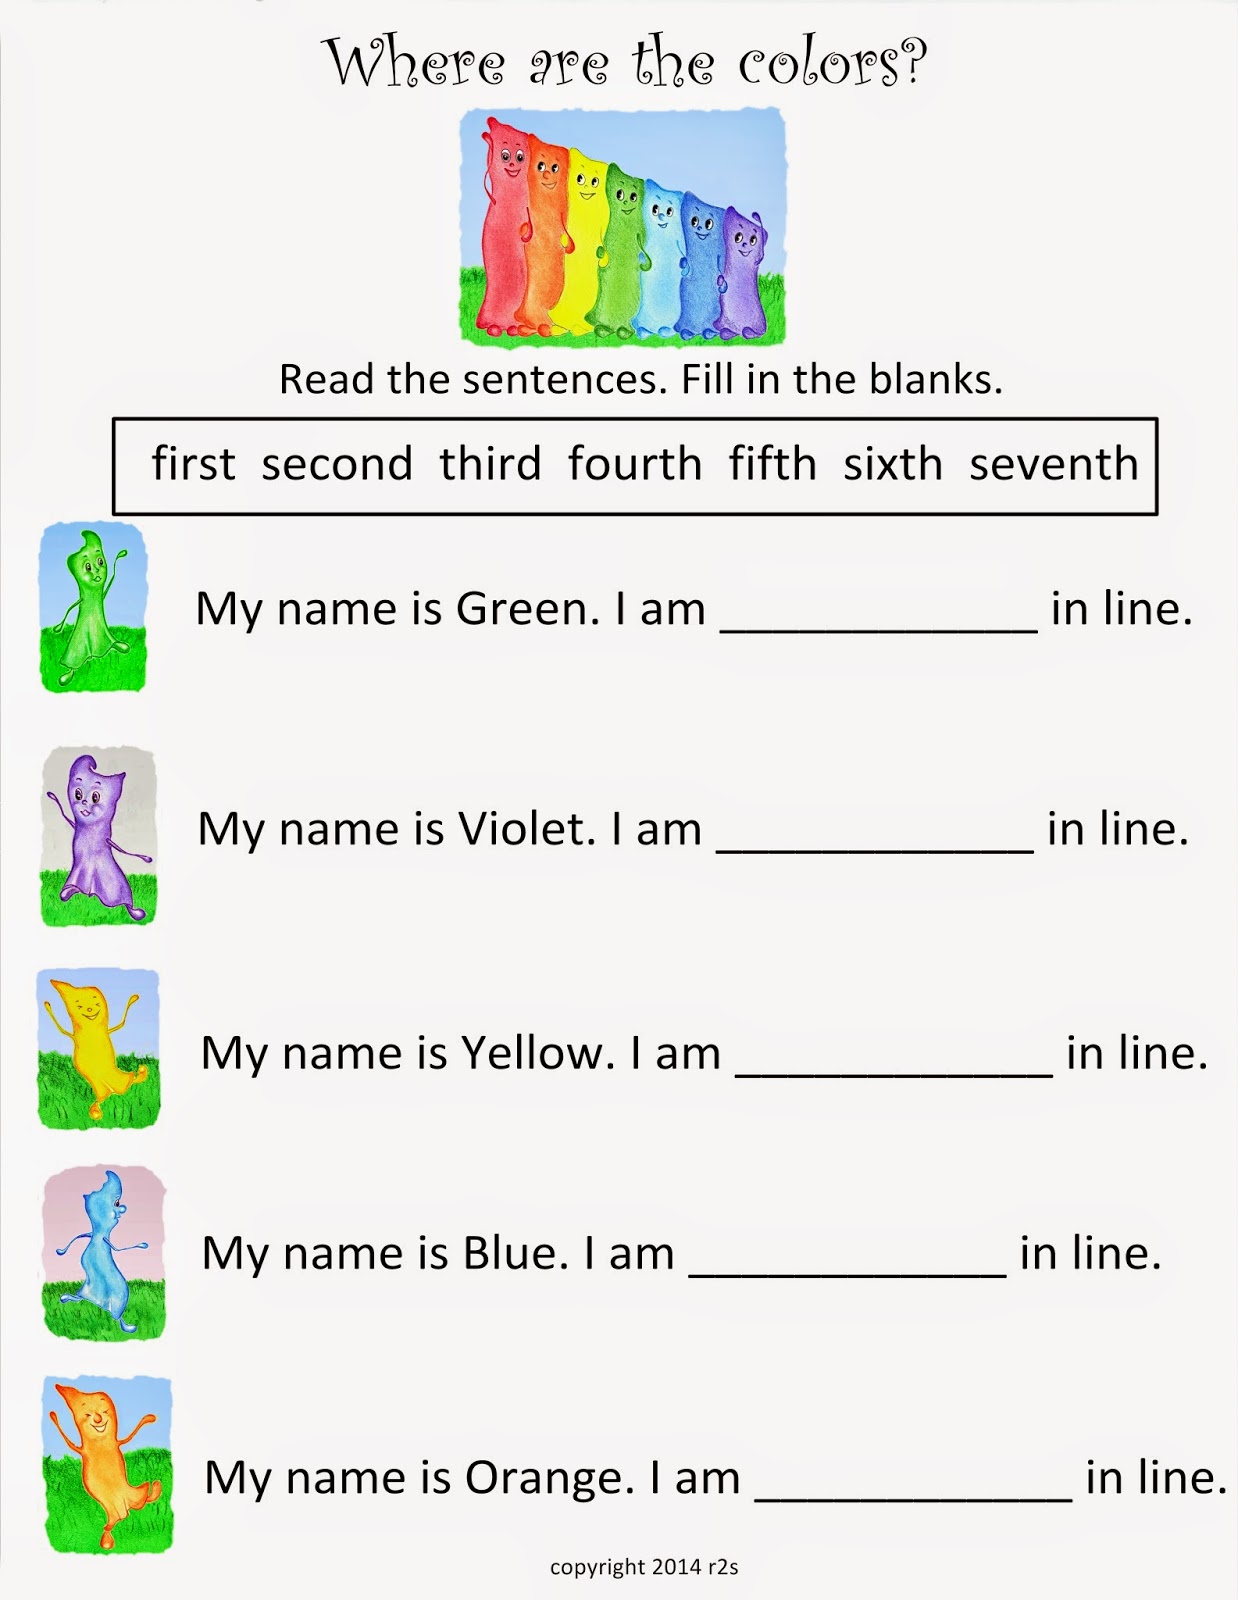
The post for today deals with the wonders of a rainbow and a quick list of activities that you can use to reinforce math skills as well as color identification.
So, print the printables and have some rainbow fun.

RAINBOW STICKS
This printable is great for teaching color concepts, ordering of sizes, and non-standard measurement (How many red strips long is the table?)

Suggestion: Print the color sticks on card stock. If you decide to use these to teach fact families, cut off the white end of each stick.
RAINBOW BRICK COUNTING STICKS
 
This printable is great for teaching addition basic facts, comparisons, and matching.
Suggestion: Print the color sticks on card stock. If you decide to use these to teach fact families, cut off the white end of each stick to more easily align each stick.

RAINBOW ADDITION
 
Create your own rainbow with pipe cleaners or wax-coated yarn to demonstrate differences in diameter.


If you are looking for a fun story that teaches colors, positional words, and the concept of teamwork to the kiddos, check out the link below to my latest story for children ages 3 through 6.


http://www.amazon.com/When-Violet-was-Blue-Troehler/dp/149612958X/ref=sr_1_1?ie=UTF8&qid=1398776065&sr=8-1&keywords=when+violet+was+blue
Link to Book and eBook on Amazon.com

Most importantly, have some RAINBOW FUN.
Happy St. Patrick’s Day!

This post was shared on the following blog. Please check them out:

The Kennedy Adventures dot Com


Friday, December 13, 2013

Last Minute Christmas Tree Craftivity & Mathtivity


The holiday break is almost here. Whether you are counting down the days until winter break or you are counting down the days to Christmas, practically everyone is counting down to something this time of year.
In this mad rush to finish the shopping, trim the tree, grade the papers, and find something to do for the kiddos in your life, the last thing you need is yet another thing to add to your list. ~Unless, of course, it is a quick, inexpensive, and easy craftivity sprinkled with a math lesson that will keep the kiddos busy while you are finishing the shopping, trimming, and grading papers.
This Christmas packet from Rainbows to Snowflakes includes an easy-to-make tree craft created with ribbon and pony beads. Also included are two math worksheets to use either as a follow-up to the craft project or as homework.
Skills addressed:
Fine motor skills
Counting with a 1-to-1 correspondence
Duplicating a pattern
Creating and solving addition sentences with answers less than 20

So put on some holiday music and have fun crafting and mathing with the kiddos.

Merry Christmas, everyone! 


This post has been shared on the following blogs. Please check them out:

ABC Creative Learning dot Com

Crafty Moms Share dot Blogspot dot Com

Kids Activities Blog dot Com

I Can Teach My Child dot com


Monday, November 11, 2013

PUT ON YOUR THINKING CAPS WITH HANDS-ON LEARNING


Today is all about my favorite veteran, my sailor husband. I am thankful for the time and devotion that so many who have proudly served our country gave to protect our freedoms and our loved ones.
Therefore, my post today is an early rendition of Thanksgiving leftovers. I am reposting an earlier post for preschool through first grade with a link to a free printable PDF.
THANK YOU TO ALL THAT HAVE SERVED OUR COUNTRY.
In a time when budgets are trimmed, dollars are stretched, and educators are forever expected to do more with less, sometimes it helps to tap into free resources to add to your curriculum materials.


Today’s post is not actually an activity—the post is how to use a FREE resource to teach and reinforce many concepts in your classroom. With a little help from your students, you can quickly fill a tub with these handy dandy manipulatives and therefore have the materials necessary for countless center ideas.
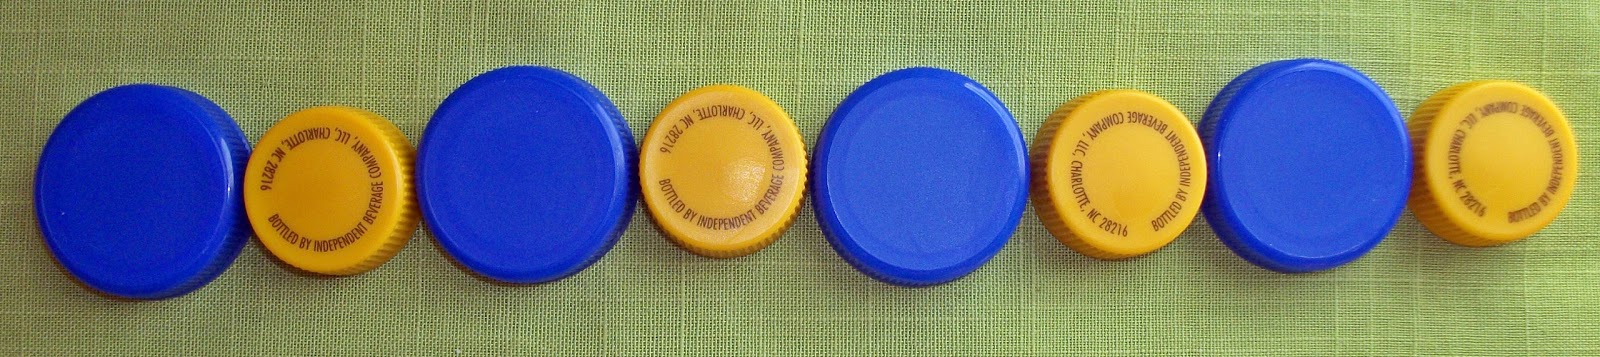
This resource of simple lids saved from common household objects can be used to teach many concepts at the preschool and primary levels. These activities can be used in a guided lesson or as a center activity.

MATERIALS:
Assorted plastic caps in multiple colors and sizes
Printout shown (optional)
 

LINK TO FREE PDF ON TEACHERS PAY TEACHERS


INSTRUCTIONS:
1. Prior to using the tub of caps, assign your students the task of collecting clean plastic lids from home.
2. Create printouts of image provided to accompany the tub of caps.
3. Put on your own thinking cap and see how many ways you can use this FREE resource with your children. Here are just a few of the possibilities:
COLOR SORTING
COMPARING BY SIZE
ORDERING BY SIZE
IDENTIFYING ORDINALS
CREATING AND EXTENDING PATTERNS
CREATING NUMBER SENTENCES
PRACTICING FINE MOTOR SKILLS
SORTING BY SHAPE

What concepts can you teach with this resource?

This post has been shared on the following blogs. Please check them out:

Living Well Spending Less dot Com


Monday, October 7, 2013

CANDY CORN or CORNY DUCKS~HOW TO FIND THE RIGHT BALANCE


Whether you teach in a public school, a private school, or homeschool, one of the challenges you face is finding the right balance to your educational endeavors. If you drill, drill, and drill some more, your children may tune out and are less likely to retain the valuable information and skills that you address. However, if the day is filled with nothing but fun and games, your children may miss out on practicing skills and internalizing much-needed information. How, then, do you strike that perfect balance?
One way is to involve your students as much as possible in the learning process. As you teach, keep communication lines open. Ask questions and answer their questions. Discuss how the skills they are practicing and the knowledge they are acquiring will transfer to other areas.
If we as educators begin this technique with children at a young age and provide meaningful lessons and activities, then our efforts will help raise children that are thinkers, doers, and problem solvers.

In an effort to help find balance, today’s activity will encourage your children to learn concepts and transfer those concepts to real-life situations. In a nutshell (or cornhusk), the activity will encourage your children to think, solve problems, and have fun while doing it.
CANDY CORN OR CORNY DUCKS—HOW TO FIND THE RIGHT BALANCE
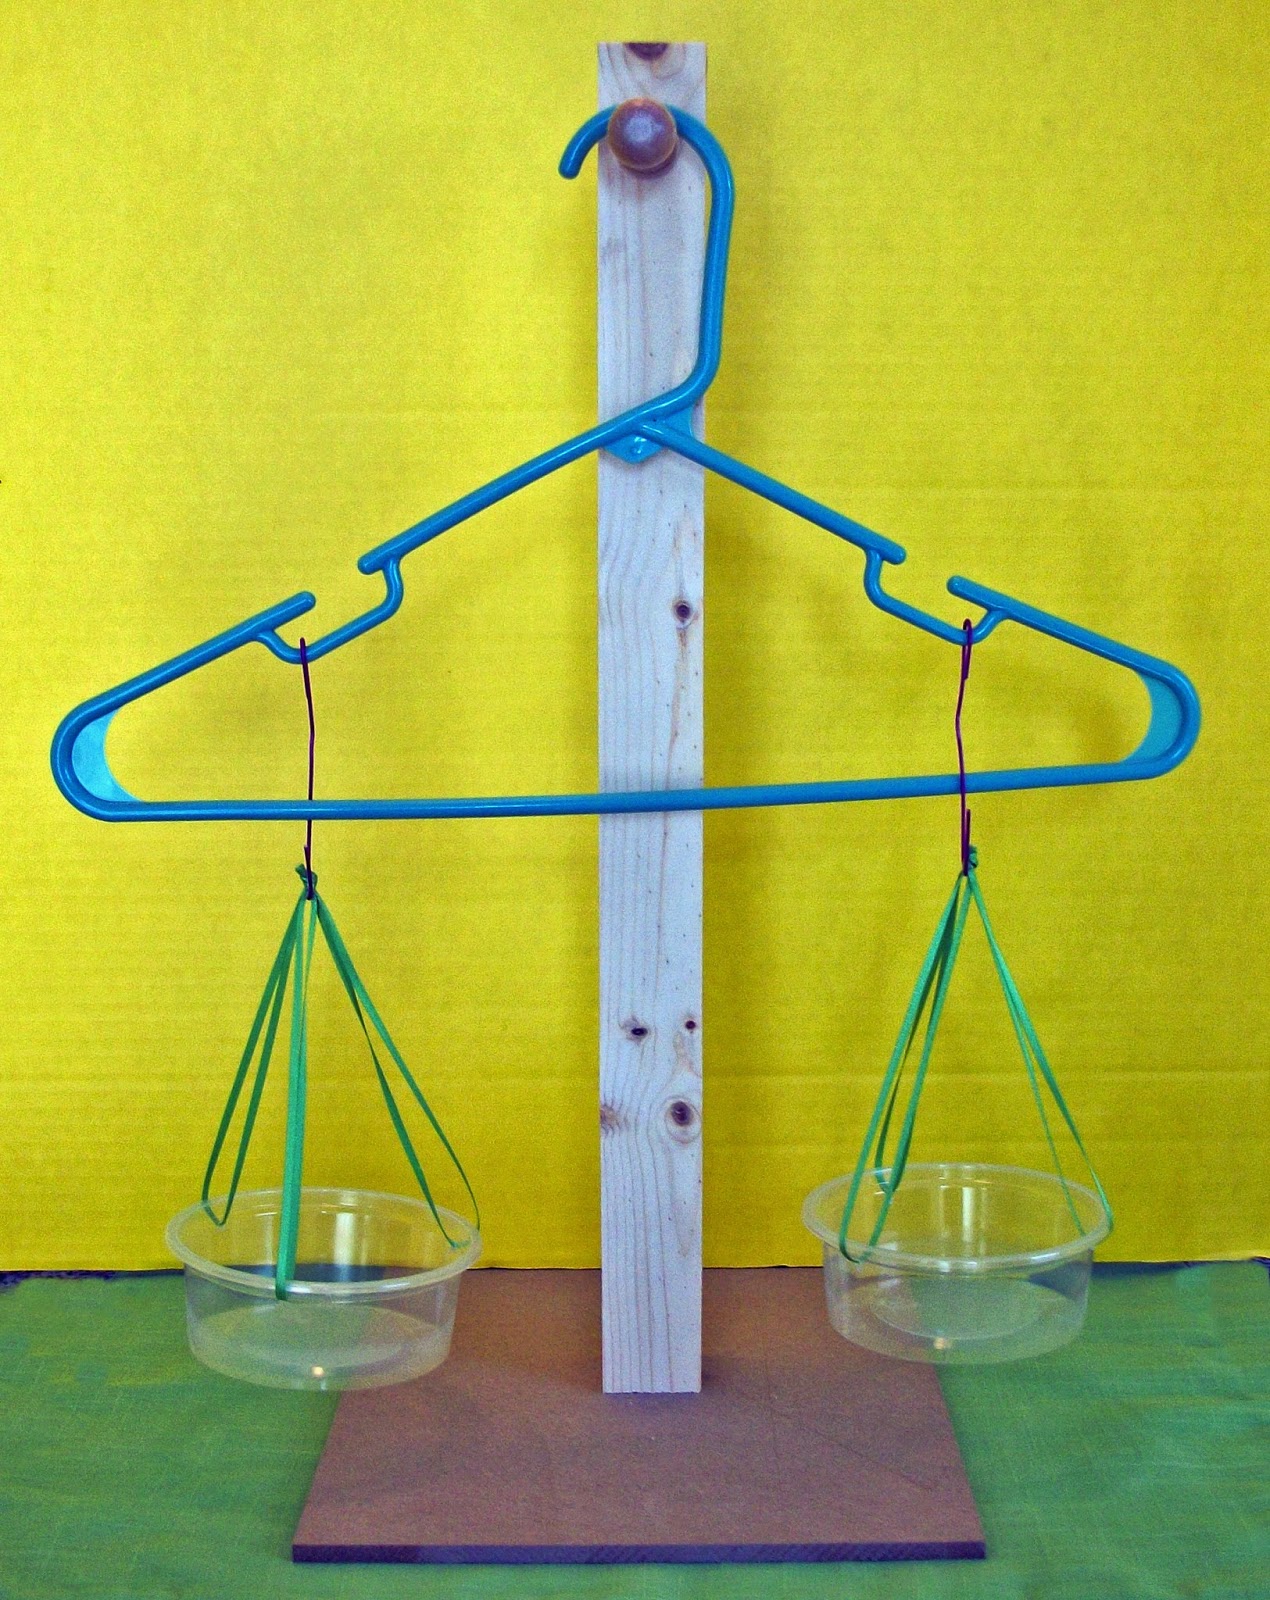
This activity consists of 2 components—creating a balance from household items and using that balance to teach and practice the concept of more and less as well as making predictions.

Grade Range: K – 2
Time to complete: 30-45 minutes
VA STANDARDS of LEARNING: Math K.2; K.8; 1.9
COMMON CORE STATE STANDARDS: CCSS.Math.K.CC.B.5; CCSS.Math.K.CC.A.3; CCSS.Math.2.OA.C.4

ACTIVITY DESCRIPTION: Students will place objects on a balance in order to compare the mass of those objects. They will count the pieces needed to move the balance pivot point to the middle. They will then make predictions on doubling or tripling those items and use the objects to determine if their predictions were correct. Students will then create number sentences to represent their findings.
PLEASE NOTE: The balance created and the balance purchased from an internet source are not devices that present truly accurate readings. They are suitable for demonstrating the concept of more, less, or the same.

MATERIALS:

MATERIALS NEEDED TO CREATE HANGER BALANCE:
Plastic hanger with hook loops
2 clear plastic containers or cups
2 paper clips
Ribbon
Hole puncher
Scissors
Ruler
Fiber board base: 2 x 2 piece of wood, hat hanger dowel, nails (OR hang the balance on a
doorknob)*

MATERIALS NEEDED TO COMPLETE THE ACTIVITY:
Set of October-themed objects (rubber ducks used for demonstration)
Candy corn and pumpkins
Small can of corn Pencil
Worksheets (provided)
Balance: Either hanger balance or balance from a retail source


INSTRUCTIONS:
Hint: The creation of the hanger balance can either be conducted as a class project or prior to completing the counting and balancing activity. Due to the small parts of the balance, it is recommended to create the balance prior to the activity for children under the age of 6.

MAKING THE HANGER BALANCE:
For best results, this balance can be used to compare objects that are less than 1 lb. in weight.
1. Using the hole punch, make 3 holes near the top of each plastic container, placing the holes equal distances apart, as shown.

2. Cut 6 lengths of ribbon that are 15 inches long, as shown.
 3. Thread the ribbon through the holes in one of the containers, as shown.

4. Align all 6 ends of the ribbon and tie them into a single knot. This knot will be used to hang the container on the paper clips at each end of the balance.
5. Repeat for the second container.
6. Open both paper clips so that one end is still bent. Bend the straight end over each end of the hanger. 
 *7 Door Knob Pivot Point: If you use a doorknob as the pivot point, your balance is finished. When in use, place the knots of the ribbons onto the paper clips AFTER adding the items to be balanced.

*7. Base Pivot Point:
A. To create the base nail or screw the 12” by 12” fiber board to the end of the 2’ x 2”.
B. Screw the hat hook onto the top of the 2 x 2” leaving approximately 1” as a buffer.

 
HOW MUCH CANDY CORN DOES IS THE SAME AS REAL CORN?

This activity is contains suggested uses for the classroom balance. Modify the instructions to meet the needs of your children.
 
1. Prior to conducting the activity, demonstrate what a balance does and how it works. As this activity involves using candy corn, one suggestion is to divide the class into 2 groups and assign a side of the balance to each group. Then pour a small bag of candy corn into the balance reservoir.
Ask: Do you think this is a fair way to divide the candy corn? How could we do this better without actually counting out ALL of the candy corn?
Then move some of the candy corn into the empty reservoir until the balance pivot point is in the middle.
2. Tell the students that they will use candy corn as a unit of measure to discover how many pieces of candy corn have the same mass (stuff)* as those objects.
A. Place a small can of corn into the balance reservoir.
B. Have the students predict how much candy corn it would take to equal the same mass (stuff) as the can of corn. Count the pieces and place them in front of the balance. Record their prediction.

C. Slowly add the candy corn to the empty reservoir.


D. If their prediction was too low, add more candy corn one-at-a-time until the reservoirs are the same level. If their prediction was too high, remove the candy corn one-at-a-time until the reservoirs are balanced. Record the final count.
3. Repeat the process using candy pumpkins and candy corn, rubber ducks and candy corn, etc.

 4. Extend the learning: This activity is great for addressing multiplication, counting on, ratios, etc.


TRANSFER THOSE SKILLS WITH BALANCE ON THE PLAYGROUND: If you are lucky enough to have access to a see saw, then apply the skills approached in the activity to balancing students. This is a great opportunity to springboard into a discussion of simple machines.


OR...
POST A COMMENT ON THIS BLOG**

*This giveaway will include the balance shown above for parents and teachers of children over the age of 4. The registration will last from the posting of this blog post until midnight, October 20, 2013. One winner will be randomly selected from the entries. The balance will be shipped from Amazon within approximately 2 weeks following the close of the giveaway. The giveaway is open to residents of the United States with a United State’s mailing address. The winner’s name will be posted on the blog, unless the winner chooses not to have his/her name posted.
**To be considered for entry into this giveaway, the entrant’s email address must be submitted to the blog administrator.

THIS POST HAS BEEN SHARED ON THE FOLLOWING BLOGS. PLEASE CHECK THEM OUT:

Kids Activities Blog dot Com

The Mom Maven dot Com

The HomeSchool Village dot Com

No Time for Flash Cards dot Com


BALANCE GIVEAWAY UPDATE, OCT. 21, 2013:

Congratulations to Berdine from FL, the winner of the balance and educational treat. I hope your little ones have fun with them.

Thank you to all that entered this giveaway. Please check back in early November for a very special giveaway.


Tuesday, October 1, 2013

LIFE IS JUST DUCKY WHEN YOU MAKE ADDITION FUN


October is finally here. That means we have reached the month of learning, fun, and giveaways on my blog.
Today’s post is a simple way to use October-themed objects to create story problems. In fact, the term problem is not entirely accurate. When your little ones use these cute little ducks to practice the concepts of counting and addition, they will be creating and solving story fun. No problems here!
So grab your rubber ducks and a handful of candy corn to have some fun with addition.
LIFE IS JUST DUCKY WHEN YOU MAKE ADDITION FUN
Grade Range: K – 1
Time to complete: 15-20 minutes
VA STANDARDS of LEARNING: Math K.6
COMMON CORE STATE STANDARDS: CCSS.Math.K.OA.A.1

ACTIVITY DESCRIPTION: Students will count up to 10 objects with correct one-to-one correspondence. They will use those concrete objects to create and solve addition problems.
MATERIALS:
Set of October-themed objects (rubber ducks used for demonstration)
Candy corn and pumpkins
Pencil
Worksheet (provided)

 
INSTRUCTIONS:
1. Prior to beginning the math portion of the activity, discuss the types of rubber ducks, giving each duck a simple name based on the costume (ex: Vampire Duck).
2. Each student will count out 10 of each type of candy to use for the addition sentences.
3. Read the first story problem to the students. Students will use their ducks and candy to create the story problem that was read to them.
4. Students will solve the addition problem and write the correct answer in the space provided.

5. Repeat steps 3-4 to solve the problems on the worksheet.
6. To check for understanding of the concept of addition of parts into a whole, students will use their candy to create their own flower, writing a number sentence to represent their creation.

MORE DUCKY FUN: Use the images on the worksheet to compare the amount of candy each duck has. For each of the 3 images shown, circle the duck that has more candy.
OR...
POST A COMMENT ON THIS BLOG**
*This giveaway will include a free set of rubber ducks for parents and teachers of children over the age of 3. The registration will last from the posting of this blog post until midnight, October 8, 2013. One winner will be randomly selected from the entries. The ducks will be shipped from Amazon within approximately 2 weeks following the close of the giveaway. The giveaway is open to residents of the United States with a United State’s mailing address. The winner’s name will be posted on the blog, unless the winner chooses not to have his/her name posted.

**To be considered for entry into this giveaway, the entrant’s email address must be submitted to the blog administrator.

THIS POST HAS BEEN SHARED ON THE FOLLOWING BLOG. PLEASE CHECK THEM OUT.

Coffee Cups and Crayons dot Com

Kids Activities Blog dot Com

I Can Teach My Child dot Com

What Do We Do All Day dot Com

 
GIVEAWAY UPDATE 10-10-13:
 
CONGRATULATIONS TO THE 3 WINNERS OF THE HALLOWEEN DUCKS:

Berdine, April, and Erica  are winners of the Halloween ducks.

Erica, from What Do We Do All Day has generously donated the value of the ducks to an upcoming giveaway that will take place in November. Thank you, Erica, for paying it forward to this VERY special giveaway.

Thank you to all that have entered this giveaway.