Wednesday, October 2, 2013

DECOMP PROJECT: What Happened to the Rain?


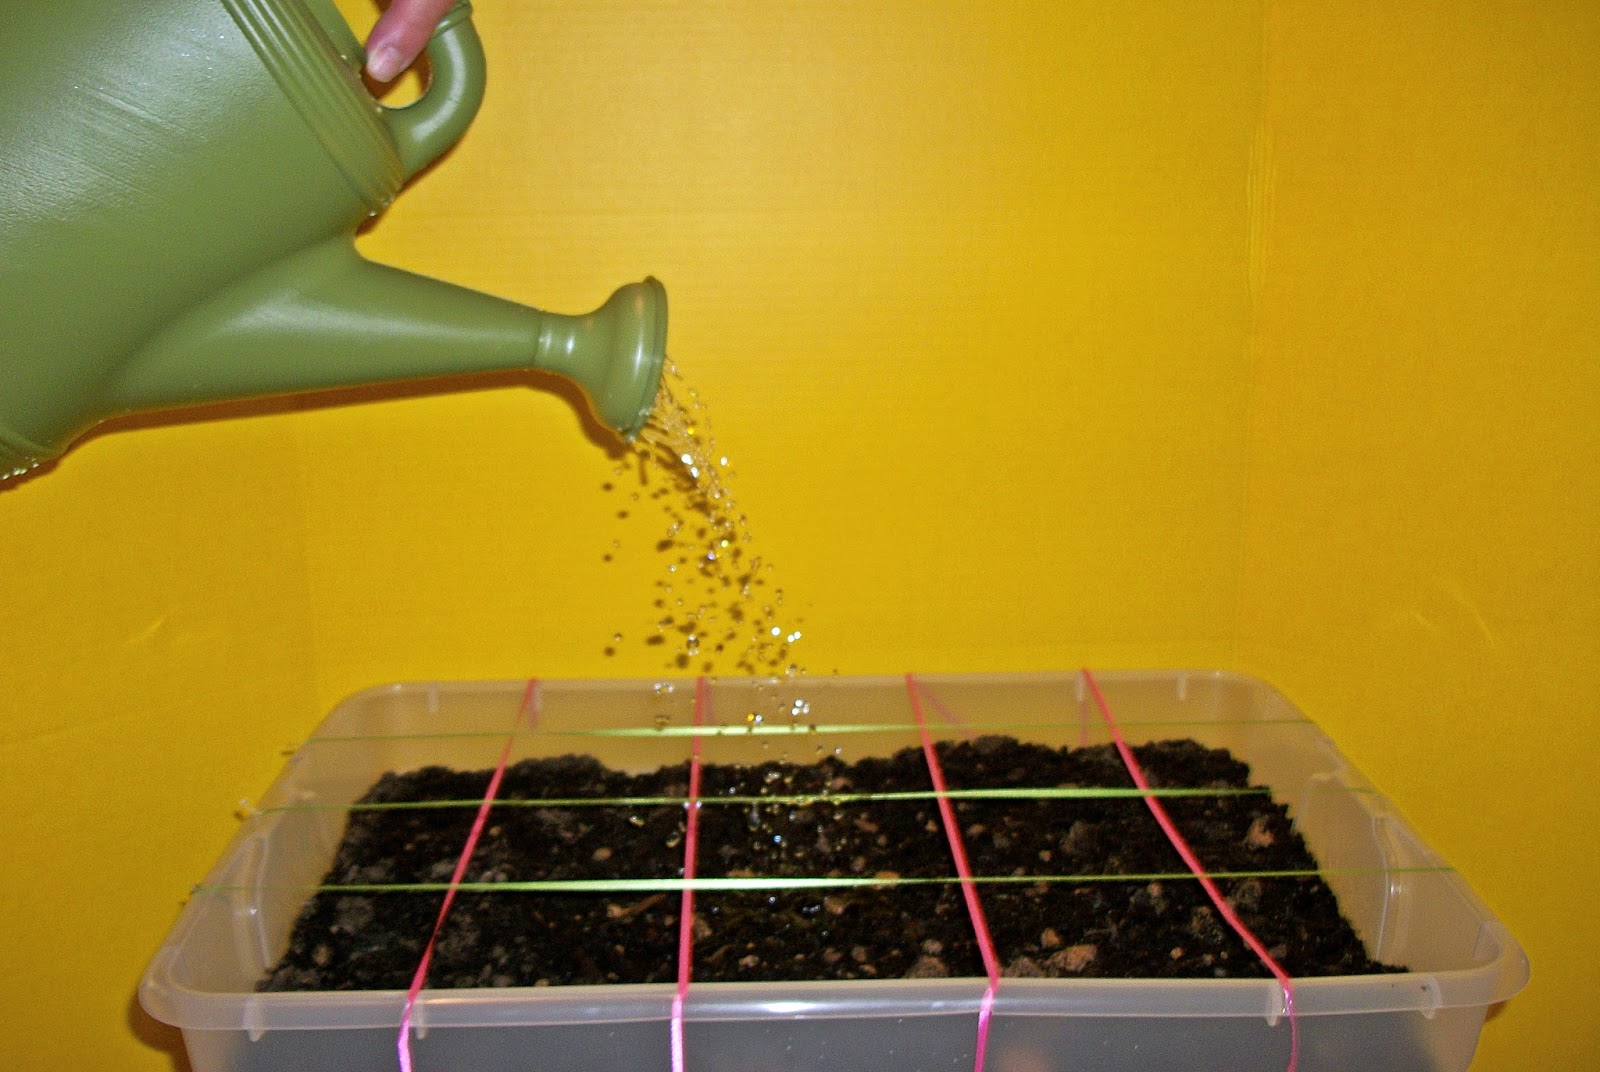
Okay. What happened to the rain? June, July, and August on the east coast brought rain, rain, and more rain. September, on the other hand, proved to be quite dry—less than 2 inches of rain fell in my town. If your area was as dry as ours, don’t fret—you can use this information to address the much-discussed topic of climate change.
Now that the first month of record keeping for your decomp project is behind you, it’s time to read and interpret this data. Today’s post is mainly a suggestion for a direction to take with regards to using the data collected for the month of September. If your students are in kindergarten, then they will learn from this data at a different level than students in third grade. Think of this data as a teaching tool and modify these tools to suit the needs of your students.
SUGGESTIONS FOR DATA USE

All month your class has faithfully used the calendar to record the amount of rain that fell. Cover each block of the calendar with color-coded sticky notes, one to represent a day with precipitation, one to represent a dry day. 


1. Count the total number of days that received rainfall.
2. Count the total number of days in between each day that received rainfall. What was the longest time period without rain? The shortest?

3. Were there any weeks where no rain fell?
4. Remove the sticky notes and create a ratio chart. For example, for our area, it rained 3 days out of thirty: It was dry 27 days out of 30. For every day that it rained, there were 9 days that it didn’t rain.

3:30 (ratio of rain days to total days)

3: 9 (ratio of rain days to dry days)


5. Add the total daily rainfall totals to the sticky notes. Add the amounts to obtain the total rainfall for the month. Conduct an internet search to compare rainfall totals September 2013 with the average for the year. Here is a great link to find the totals.

Weather dot Com

Remember to continue adding rainfall to your indoor ‘rain gauge’.

Now that the record keeping is finished, why not head over to some of the other blog posts for Halloween fun and giveaways.

Tuesday, October 1, 2013

LIFE IS JUST DUCKY WHEN YOU MAKE ADDITION FUN


October is finally here. That means we have reached the month of learning, fun, and giveaways on my blog.
Today’s post is a simple way to use October-themed objects to create story problems. In fact, the term problem is not entirely accurate. When your little ones use these cute little ducks to practice the concepts of counting and addition, they will be creating and solving story fun. No problems here!
So grab your rubber ducks and a handful of candy corn to have some fun with addition.
LIFE IS JUST DUCKY WHEN YOU MAKE ADDITION FUN
Grade Range: K – 1
Time to complete: 15-20 minutes
VA STANDARDS of LEARNING: Math K.6
COMMON CORE STATE STANDARDS: CCSS.Math.K.OA.A.1

ACTIVITY DESCRIPTION: Students will count up to 10 objects with correct one-to-one correspondence. They will use those concrete objects to create and solve addition problems.
MATERIALS:
Set of October-themed objects (rubber ducks used for demonstration)
Candy corn and pumpkins
Pencil
Worksheet (provided)

 
INSTRUCTIONS:
1. Prior to beginning the math portion of the activity, discuss the types of rubber ducks, giving each duck a simple name based on the costume (ex: Vampire Duck).
2. Each student will count out 10 of each type of candy to use for the addition sentences.
3. Read the first story problem to the students. Students will use their ducks and candy to create the story problem that was read to them.
4. Students will solve the addition problem and write the correct answer in the space provided.

5. Repeat steps 3-4 to solve the problems on the worksheet.
6. To check for understanding of the concept of addition of parts into a whole, students will use their candy to create their own flower, writing a number sentence to represent their creation.

MORE DUCKY FUN: Use the images on the worksheet to compare the amount of candy each duck has. For each of the 3 images shown, circle the duck that has more candy.
OR...
POST A COMMENT ON THIS BLOG**
*This giveaway will include a free set of rubber ducks for parents and teachers of children over the age of 3. The registration will last from the posting of this blog post until midnight, October 8, 2013. One winner will be randomly selected from the entries. The ducks will be shipped from Amazon within approximately 2 weeks following the close of the giveaway. The giveaway is open to residents of the United States with a United State’s mailing address. The winner’s name will be posted on the blog, unless the winner chooses not to have his/her name posted.

**To be considered for entry into this giveaway, the entrant’s email address must be submitted to the blog administrator.

THIS POST HAS BEEN SHARED ON THE FOLLOWING BLOG. PLEASE CHECK THEM OUT.

Coffee Cups and Crayons dot Com

Kids Activities Blog dot Com

I Can Teach My Child dot Com

What Do We Do All Day dot Com

 
GIVEAWAY UPDATE 10-10-13:
 
CONGRATULATIONS TO THE 3 WINNERS OF THE HALLOWEEN DUCKS:

Berdine, April, and Erica  are winners of the Halloween ducks.

Erica, from What Do We Do All Day has generously donated the value of the ducks to an upcoming giveaway that will take place in November. Thank you, Erica, for paying it forward to this VERY special giveaway.

Thank you to all that have entered this giveaway.


Monday, September 30, 2013

GET READY FOR THE CORNY MONTH OF OCTOBER WHEN LIFE IS JUST DUCKY


I just love autumn! The crisp air and changing of the seasons add fun and excitement to just about everything we do.
This is especially true for the upcoming month of October when everyone taps into their inner kid. Young or old, this post is a reminder to have fun this autumn.
Later this week, the first giveaway and educational activity for the Corny Month of October when life is just ducky will be posted. In the meantime, here is another teaser--this time with a bit of educational value.


TEACHING ORDINAL NUMBERS


Thursday, September 26, 2013

GETTING READY FOR A VERY CORNY MONTH IN OCTOBER


October and corn naturally go together. With that trend in mind, today’s post will be a teaser for the month ahead. On this blog, October will definitely be a month full of treats—no tricks will be seen here.

To get your creative juices flowing, as well as your little ones thinking, I’m posting a quick and easy-to-do sort and match activity based on October-themed manipulatives. 


Please check this blog in October for a treat bag full of ideas, printables, giveaways, and more.

Be sure to waddle back in October for MORE manipulative fun.

Monday, September 23, 2013

ADVENTURES at WALNUT GROVE: BOOK REVIEW & GIVEAWAY


Short, tall, brown hair, red hair—we all look different in one way or another. Early in life, infants quickly learn to recognize their parents by looking at their faces and hearing their voices. Our differences, both inside and outside, are what make us unique. However, sometimes the differences between us become not only a symbol of our originality but also a misguided opportunity for teasing or ridicule. Adventures at Walnut Grove, by Dana Lehman and Judy Lehman, provides parents and educators a wonderful opportunity to approach the delicate subject of teasing.

Lehman's story unfolds in a setting inviting to any child—a summer resort filled with friendship and fun. As many of us know, summer vacations can provide laughter, create fond memories, and help us to develop lifelong friendships. Lehman's story presents the reader with the all the excitement and adventure one would expect from a fun-filled resort vacation—from wonderful games of softball (walnut ball) to the friendly competition of swimming races.
At the other end of the spectrum, however, many of us can also relate to the moment when all the fun is washed away by tears brought on by an unkind word. Sammy Squirrel, the main character, experiences this sadness when a newcomer to Walnut Grove makes fun of his appearance. Sammy cries, but does not lash out at Bucky, thus presenting the first of Lehman's timeless lessons.
As the story progresses, Lehman continues to communicate to the reader how teasing effects everyone. Bucky, the beaver that teased Sammy, learns a valuable lesson in empathy when the teaser becomes the teased. This turn of events provides parents with a great opportunity to find teachable moments in their child's life. Usually, when one child teases another, there is a reason behind the unkind act. In Bucky's case, he didn't mean any harm when he made fun of Sammy; he merely wanted Sammy to strike out while he was at bat in the game of walnut ball. When Bucky is teased by another character in the story, Lehman guides the reader through the best way to solve the problem.
In the end, the animals are once again great friends enjoying their time together in Walnut Grove.
Adventures at Walnut Grove is a delightful story that is beautifully enhanced by watercolor illustrations.
 

THE DETAILS:
Total Word Count: 878
Average word count per 2-page spread: 68
Extra Value: Provides valuable lesson on empathy and a reminder not to tease others

Dana Lehman’s series of books based on Walnut Grove can be found on Amazon and her website. Please check out the other exciting stories that take place in Walnut Grove.

The activities that I created to accompany this book are a terrific way to reinforce the skills of identifying differences in others and celebrating those differences.
EACH OF US IS BEAUTIFULLY DIFFERENT
ACTIVITY DESCRIPTION: Students will sort animal cards by a specified attribute. They will then select animals from at least two categories to create a new animal. They will create a verbal description of the newly created animal.
Grade Range: K-2nd
Time to complete: 30-45 minutes

Materials:
Animal cards
Note cards with categories
Crayons, markers, watercolors, or colored pencils
Paper
Instructions:
1. Conduct a classroom discussion based on the following introduction—

Try to imagine a world where everything is the same. What if you had to eat the same food for breakfast, lunch and dinner every day? What if everyone had the same type of pets? Bikes? Houses? Toys? Etc. Now try to imagine a world that is filled with variety. How would that world be different? Which world would you like to live in? Why?
2. Flip through the animals cards and discuss how the animals are different. (Size, shape, color, number of legs, type of skin, etc.)

3. Sort the animals by various attributes,  similar to the categories shown below.

 
4. Students will then choose 1 animal from each of the categories and create their own unique animal. They will then name their animal.


5. Write or verbally create a description of that animal.

The artwork for the Snabbit and Butterdog were generously created by Ali from Florida.

ARE YOU A SQUIRREL, A BEAVER, OR A LITTLE BIT OF BOTH—A SQUEAVER?
 
This activity addresses not only the skills of positively identifying our individualities, but it also provides a way to embrace those differences. It hurts when someone calls us names. By creating a unique animal based on individual preferences, and giving the animal a special name, this activity provides a gentle way to deal with teasing by others.
True Story: There was once a child that loved collecting rocks. He often came home from school with his pockets loaded with rocks of every shape, size, and color. Sadly, the boy was teased and called ‘Rocks and Minerals’. He was sad that his friends and classmates made fun of him because of his hobby. The boy had a wonderful science teacher that encouraged his passion for discovery and realized that her student was as unique as the rocks he collected.
When that boy grew up he went on a rock and fossil hunt near the Chesapeake Bay. While there, he discovered a rare type of whale fossil. That fossil, a whale from the Miocene era, now resides in a museum in Maryland.
ACTIVITY DESCRIPTION: Students will create an animal based on their personal preferences. They will then use that animal to compare with the animals created by others in the class.
Grade Range: 1-4
Time to complete: 30-45 minutes

Materials:
Animal Printouts (provided)
Crayons, markers, or colored pencils
Glue
Scissors
Paper

Instructions:
1. Prior to the activity, prepare an animal glyph based on your choices for the animal components.
Ask: Looking at the animal I created, and the key, what do you think is my favorite outdoor fun? Indoor fun? Helping fun?

Explain that the students are going to create their own animal, based on their favorite things to do.
2. Show the key to the students. Discuss the options for each category.


3. Give the animal printout and the key to the students.
 
4. Students will cut out the animal components based on their choices. They will then glue them to paper to create a unique animal

5. For the section entitled Indoor fun, instruct the students to draw their favorite item, cut it out, and add it to the paws of their animal. This addition will make their animal creations TRULY unique.
6. When the animal glyphs are completed, student will share their choices in small groups.
Hint: You can mix up the groups by having them find classmates with some similarities, some differences, or all differences. This is a wonderful opportunity to help select students for classroom chores.

OR...

*This giveaway will include a free copy of Adventures at Walnut Grove (Dana Lehman & Judy Lehman), as well as a $10 gift card for a future Amazon purchase. The registration will last from the posting of this blog post until midnight, October 7, 2013. One winner will be randomly selected from the entries. The books and treat will be shipped from Amazon within approximately 2 weeks following the close of the giveaway. The giveaway is open to residents of the United States with a United State’s mailing address. The winner’s name will be posted on the blog, unless the winner chooses not to have his/her name posted. To be considered for entry into this giveaway, the entrant’s email address must be submitted to the blog administrator.
 

This post was linked to the following blogs. Please check them out:

Mother Daughter Book Reviews dot Com

Kids Activities Blog dot Com

Living and Learning at Home dot Com

I Can Teach My Child dot Com

The Mom Maven dot Com

GIVEAWAY UPDATE 10-8-2013:

Congrats to the winners of the book and Amazon gift card: Amy, April, and William.

I will post the final winner's name when I receive confirmation from that winner.

Thank you to all of the entrants to this giveaway.


Monday, September 16, 2013

DECOMP PROJECT Connection Activity: Ignite Their Curiosity with Water

Now that a couple of weeks have passed since your students took out the trash (i.e. buried items in their decomp tub), it is almost certain that your students have begun to ask questions.

“What’s happening under the dirt?”
“Why do we have to add water to the dirt?”
Or, better yet…
“WHEN can we dig up the trash?”
These are all good questions that will encourage your students to seek answers.
Today’s connection activity will answer one of those questions, but will also motivate your students to pose more questions to be answered as the Decomp Project continues.
The following activity is a demonstration on the breakdown of material that occurs during decomposition. While this is not a complete example of the decomposition process, the activity will serve to illustrate one very important fact.--The plastic in our world affects many aspects of our lives.

IGNITE THEIR CURIOSITY WITH WATER

Grade Range: K – 3
Time to complete: 20-30 minutes
VA STANDARDS of LEARNING: SCIENCE K.1, 1.1, 1.3, 2.1, 3.1, 3.10

The purpose of this activity is to provide a visual example of how paper breaks down when it is exposed to water.
ACTIVITY DESCRIPTION: Students will place several types of paper into a water bath (one set placed directly into the water and the other set protected in a sealed plastic bag) and shake the contents of the water bath. They will compare the results of the paper that is directly placed in the water with the paper that is contained in plastic. They will then make predications about some of the items that are buried in the decomp tub.

MATERIALS:
3 Pint-sized plastic containers with lids
1 cup measuring cup
3 cups water
2 4” x 4” squares of toilet paper
2 4” by 4” squares of bargain brand notebook paper
2 4” x 4” squares of bargain brand paper towels
3 zippered sandwich bags
2 cups dry soil
Small strainer

INSTRUCTIONS:
1. Prior to the activity, prepare the materials by placing one of each type of paper into a sandwich bag and sealing it.

2. Conduct a discussion about paper and what paper is made from (wood pulp or recycled paper).
3. Pour 1 cup of water into a plastic container.
4. Place a plain piece toilet paper into the water and put the lid onto the container.
 
5. Shake the container vigorously for 30-45 seconds. Note any changes in the paper.
 
6. Using the strainer, drain the water from the paper pulp that was created. Set this pulp aside for later.

7. Repeat steps 3-5, substituting the toilet paper in the sealed plastic bag into the water. Hint: The paper in the sealed plastic bag should remain dry and unchanged.

8. Continue steps 3-5, substituting the remaining paper that is pictured above.
Ask: Why did the paper in the plastic bags stay in one piece? Why did some of the plain paper (not sealed in plastic) take longer to break into smaller pieces?
9. Take the pulp that was strained in step 6, add it to the dirt, and mix well. Take the plastic bags with the paper sealed inside and ‘stir’ them into the dirt. Discuss why stirring the sealed bags doesn’t work as well.

 
Explain that when water is added to the decomp tub, some of the items might change. It will take longer than it did today, but there will be changes by the end of the year.
Ask: What items in our decomp tub do you think will change by the end of the school year? What items in the decomp tub do you think will not change? Why?
 
10. Make a list of the predictions to display beside the predictions made at the beginning of the Decomp Project. Discuss any changes in the predictions.

EXTEND THE LEARNING; EXTEND THE DISCOVERY; EXTEND THE FUN:
Now that your students are beginning to comprehend the process of decomposition, plant more seeds of curiosity.
Ask the students what happens when the plastic trash bags that every home, every school, every store, every restaurant, every—well, you get the idea, EVERYONE uses gets taken away by the trash trucks. More activities based on this very important question will be added to the Decomp Project later in the year.

For now, however, the pulp that was created (and possibly more paper pulp from your classroom recycle box) can be used to create their OWN paper. Your students will have fun while they are adding to their awareness of their impact on the environment.

The video below is a fantastic demonstration of the paper making process.


Monday, September 9, 2013

DECOMP PROJECT: My Goodness, That's a LOT of Water!

Your Decomp Project is under way and your students have adjusted to their daily trek to the classroom. Those changes are behind you. However, big changes in weather patterns are still on the horizon. In our area we have progressed from the soggy summer to the unpredictable weather patterns of the fall. In fact, since our rainfall on September 1, we have had nothing but sunny days. However, I am certain that the sun will soon be replaced with downpours and all out gully washers. With the inevitable heavy rains ahead, I thought I’d take this opportunity to provide the first of my connection activities to accompany the Decomp Project.(Link)

On those days where your area can easily receive 2 or 3 inches of rain in a 24 hour period, you might begin to wonder how on earth your little ones are going to manage to get all of that water into the decomp tub without spilling it. During the setup you placed the lid under the tub to catch the water run off. This is the time to remind you to regularly empty that lid, so that you do not end up with a muddy mess on your classroom floor.
Hint: If a huge autumn storm is predicted in your area, I recommend that you move the decomp tub to an outdoor location until the rain has stopped. Make sure it is placed where the drainage holes can do their job!

Now, back to the activity—an efficient way to make ‘rain’ fall on your decomp tub that is paired with a math connection.

Adults and children know that a gallon is bigger than a cup. How many times have your little ones tried to pick up a full gallon of milk only to find out it’s a bit more than they can handle? With that in mind, this quick activity and visual aid can help your ‘rainfall’ days with your decomp tub run more smoothly.
MY GOODNESS THAT’S A LOT OF WATER!
While this activity is intended to be conducted as an extension to the Decomp Project, it can easily be modified to serve as a stand-alone activity.

HINT: This initial measurement activity takes a long time to complete (60-75 minutes). It can be divided into more than one session. Once this activity has been completed, it lays the groundwork for a faster and more efficient way to transfer rain water to the decomp tub.
Virginia: Math Standards of Learning: VA SOL 2.11c; 3.9b
*Common Core Connection: CCSS Math Content 3.Md.B; CCSS Math Content 4. Md.A
*The common core standards base liquid measurement in terms of liters. If you are following the Common Core  State Standards to the letter, then substitute liters for gallons. The visual aid will not apply. It may not be suitable in classrooms that strictly adhere to the metric system of measurement.

ACTIVITY DESCRIPTION: Children will use various containers to build understanding of the concept of volume. They will pour water from one container to another and draw conclusions about different units of liquid measurement. They will compare volume in forms of cups, pints, quarts, and gallons.

MATERIALS:
Decomp tub (link to set-up andmaterial list)
Additional plastic tub the same size as the decomp tub
Containers for liquid volume: cup, pint, quart, gallon
Funnel *optional
Permanent Marker
Ruler
Rain Gauge
Visual Aid Chart (provided)
Watering Can


INSTRUCTIONS:
1. Prior to conducting this activity, gather various containers that hold cups, pints, quarts, and gallons.
2. Show the containers (pint size shown) to the students.
Ask: Which container do you think holds the most amount of water? The least?
ALL CONTAINERS HOLD 1 PINT
3. Using the 1 cup measuring cup, fill each container with water. Count the number of cups required to fill each container. Explain to the students that all of these containers hold the same amount of liquid. Discuss why the containers can look different, but still hold the same amount of liquid.
4. Show an example of each of the following liquid measurement containers to the students: cup, pint, quart, and gallon. For younger students, writing the size on the container with a permanent marker is recommended. (Cup-C, Pint-P, Quart-Q, Gallon-G)
**5. Mark the inside of the tub with permanent marker to indicate inches of rain (half inch increments for second and third grade).
**6. After the rain falls in your area, bring the rain gauge into the classroom. Show the gauge to the students and discuss how much rain had fallen. For grades K-1, estimate to the nearest inch. For grades 2-3, estimate to the nearest half inch.

**7. Fill the large tub with water to match the level of water in the rain gauge.

7. (Stand Alone Activity Step) Fill the plastic container approximately half way with water.
**8. Using the cup-sized measuring cup, take turns filling the watering can with water, counting the number of cups it takes to fill the can. This step does not need to be completed until the can is full. The intent of this step is to show that it takes MANY cups to fill the can.

Ask: Which container do you think would be a faster one to use to fill the watering can? Why?
**9. This is the opportunity to assist students with making connections between container sizes as well as provide an easier way to ‘water’ the decomp tub.. Suggest that while the gallon container provides challenges, it might be the fastest way to get the water from the rain tub to the decomp tub. First, the students must determine how many gallons it takes to reach the level of water from the rainfall.

10. Take turns using the cup-sized measuring cup to fill the gallon container, scooping the water from the plastic tub. Count the number of cups necessary to do so (16). Repeat this process until the plastic tub is empty. If the gallon container is not full at the end, use the visual aid to determine how much of the gallon container is actually filled.
 
**11. Each time the gallon container is filled, the teacher or parent can use that to fill the watering can. Sprinkle the watering can over the decomp tub.
 
**12. In the future, before adding the rainwater to the decomp tub, use the markings on the plastic tub to determine how many gallons and cups of water are needed. For example, with the tub used in this demonstration, it took 2 gallons and 3 cups to equal 1 1/2 inches of rain water.

1.5” of rain= 2 gallons 3 cups
**Steps with the double asterisk are intended to be used with the Decomp Project. If your students are conducting this activity as a stand-alone activity, you may omit these steps.

More Math Measurement: This activity will provide countless math extension opportunities. Track how many cups, pints, quarts or gallons of rain are poured onto your decomp tub. By the time yearly educational assessments roll around, your students will have mastered the related math objectives and had lots of fun while do so.
Check this blog frequently for additional activities to add to your Decomp Project.

This post is shared on the following blogs. Please check out their terrific ideas:

The Educators Spin on It