Showing posts with label lesson plan. Show all posts

Monday, September 22, 2014

AUTUMN, CHANGES, & BUTTERFLY BATIK

Change—New Paths—New Directions

While most of us realize that in order to grow we must step out of our comfort zone and explore new paths in life. However, recognizing the need to change directions and actually taking that first step are often at opposite ends of the spectrum. Many times we need a nudge to help us take that first step. For me, the nudge came in the form of a major health setback. I was forced to make choices that I preferred not to make. Yet, now that I can look back at the footprints I have left on that new path, I realize that my change in direction was a good choice to make.

Since the beginning of 2014 my blog posts have become less frequent. In fact, for several months I did not even add a new post. I apologize for the lack of new educational ideas and activities during this time. I have come to the conclusion that for the remainder of 2014, I must devote my time to my family, my health, and personal commitments. Trying to juggle all of those needs with maintaining this blog was not in the best interest of my family, my readers, and my health. I intend to return to this blog in 2015, hopefully renewed and revitalized. In that time, please remember that monthly activities and ideas that I posted in 2013 and early 2014 will still provide creative suggestions for making learning fun and memorable.

My final blog post for 2014 fits in perfectly with my decision to journey down a different path for a while. Mother Nature is on her own path to change with the turning of the seasons. While pictures, books, classroom decorations, and the like lead us to believe otherwise, the transition from one season to the next is anything but sudden. For weeks in our area summer has been fighting to maintain its hold on our region. In fact, during the first week of September we had record breaking temperatures. Our usually wet month of September has been dry. Yet, each morning, there is a glimmer of hope that the cooler autumn weather is winning the battle of the seasons. Spiders are capturing the dew each morning and now spinning the spectacular webs that are synonymous with fall. Moths and butterflies are hastily slurping the last of the nectar from the fading blossoms of summer. Caterpillars are beginning to stake their claim to their sleeping grounds to ride out their transition to new creations—moths and butterflies that will emerge in the spring.

Summer to autumn
Autumn to winter
Winter to Spring
Spring to Summer

The endless change of directions that nature takes is a reminder to all of us that to grow we must change, even if the change may not be as easy as we’d like.

As my final educational activity for 2014, I have chosen a craftivity centered on what I believe are the ultimate examples of change—butterflies. From the moment they hatch into a tiny caterpillar until the time comes to settle into a deep metamorphic slumber, butterflies are nature’s example of how trust in change can result in beautiful creations. When a butterfly lays her eggs, not knowing if her efforts will succeed, she trusts that the leaf, the branch, or the seedpod will provide for her young offspring. The caterpillars emerge and forage for weeks, trusting that food will be readily available. They grow and shed one casing after another, trusting nature to protect them during each transition. Then, the caterpillars trust nature once again to protect them as they spin their protective chrysalis and finally emerge a magnificent winged creature.

The activity below provides children with an opportunity to demonstrate how change (addition of paint to a crayon resist background) can yield beautiful results.
Beautiful Butterfly Batik*
Objective: Children will learn the traditional method of batik (hot wax resist), but use that information to create a variation of the method—crayon batik.

Materials:
Crayons with fine points
Sturdy paper or cardstock
Diluted tempera or acrylic paint
Large bowl
Optional: butterfly template (provided)
Plain newsprint or screen mat for drying


Procedure:
Preparation: Prior to conducting the activity, pour a small amount of paint into a large bowl. Dilute the paint with water so that there is ample pigment in the water, but the paint is now the consistency of water. This will be used as the paint bath to dye the crayon artwork.


1. Show your children pictures of traditional batik (Hint: an internet search will provide some excellent examples).
2. Discuss the process for creating traditional batik.
A. Paint melted wax on fabric.
B. Dye the fabric a light color and allow to dry. The dye will resist the fabric that is coated in wax.
C. Add more melted wax. Repeat the dying process.
D. When the last dye has been added and dries, the wax is melted from the fabric, usually with a hot iron.
The result is a design with bold colors and lines that crisscross the colors where the wax cracked during the dying process.
3. Ask the children to use the crayons draw a block style picture of a butterfly or moth, encouraging the children to use large shapes with small spaces in between. It is important that the crayons completely cover each shape with a thick layer of wax.
 
 
4. Fold and crinkle the paper into a ball.
 
5. Unfold the paper and briefly dip it into the bowl of diluted paint. (Hint: younger children may need to be reminded that if their artwork is allowed to remain in the paint too long, the paper fibers may become weak and tear.)
 
 
6. Place the artwork on a flat surface to dry.


The faux batik butterfly artwork is a combination of different mediums that can represent the change of the seasons. When the children look at their completed artwork, ask them to find the small lines of paint that worked their way into the blocks of crayon wax. Explain that these lines can represent the days where our seasons are a mixture of two seasons—for example, very hot days in September that begin chilly with a heavy dew coating the windows and plants.

*I originally created this activity for a wonderful web site that focuses on teaching children the wonders of nature and how butterflies are wonderful ambassadors for nature’s ability to grow and change. Please check out their site for more activities and information about butterflies.

Kids Butterfly dot Org

Monday, September 23, 2013

ADVENTURES at WALNUT GROVE: BOOK REVIEW & GIVEAWAY


Short, tall, brown hair, red hair—we all look different in one way or another. Early in life, infants quickly learn to recognize their parents by looking at their faces and hearing their voices. Our differences, both inside and outside, are what make us unique. However, sometimes the differences between us become not only a symbol of our originality but also a misguided opportunity for teasing or ridicule. Adventures at Walnut Grove, by Dana Lehman and Judy Lehman, provides parents and educators a wonderful opportunity to approach the delicate subject of teasing.

Lehman's story unfolds in a setting inviting to any child—a summer resort filled with friendship and fun. As many of us know, summer vacations can provide laughter, create fond memories, and help us to develop lifelong friendships. Lehman's story presents the reader with the all the excitement and adventure one would expect from a fun-filled resort vacation—from wonderful games of softball (walnut ball) to the friendly competition of swimming races.
At the other end of the spectrum, however, many of us can also relate to the moment when all the fun is washed away by tears brought on by an unkind word. Sammy Squirrel, the main character, experiences this sadness when a newcomer to Walnut Grove makes fun of his appearance. Sammy cries, but does not lash out at Bucky, thus presenting the first of Lehman's timeless lessons.
As the story progresses, Lehman continues to communicate to the reader how teasing effects everyone. Bucky, the beaver that teased Sammy, learns a valuable lesson in empathy when the teaser becomes the teased. This turn of events provides parents with a great opportunity to find teachable moments in their child's life. Usually, when one child teases another, there is a reason behind the unkind act. In Bucky's case, he didn't mean any harm when he made fun of Sammy; he merely wanted Sammy to strike out while he was at bat in the game of walnut ball. When Bucky is teased by another character in the story, Lehman guides the reader through the best way to solve the problem.
In the end, the animals are once again great friends enjoying their time together in Walnut Grove.
Adventures at Walnut Grove is a delightful story that is beautifully enhanced by watercolor illustrations.
 

THE DETAILS:
Total Word Count: 878
Average word count per 2-page spread: 68
Extra Value: Provides valuable lesson on empathy and a reminder not to tease others

Dana Lehman’s series of books based on Walnut Grove can be found on Amazon and her website. Please check out the other exciting stories that take place in Walnut Grove.

The activities that I created to accompany this book are a terrific way to reinforce the skills of identifying differences in others and celebrating those differences.
EACH OF US IS BEAUTIFULLY DIFFERENT
ACTIVITY DESCRIPTION: Students will sort animal cards by a specified attribute. They will then select animals from at least two categories to create a new animal. They will create a verbal description of the newly created animal.
Grade Range: K-2nd
Time to complete: 30-45 minutes

Materials:
Animal cards
Note cards with categories
Crayons, markers, watercolors, or colored pencils
Paper
Instructions:
1. Conduct a classroom discussion based on the following introduction—

Try to imagine a world where everything is the same. What if you had to eat the same food for breakfast, lunch and dinner every day? What if everyone had the same type of pets? Bikes? Houses? Toys? Etc. Now try to imagine a world that is filled with variety. How would that world be different? Which world would you like to live in? Why?
2. Flip through the animals cards and discuss how the animals are different. (Size, shape, color, number of legs, type of skin, etc.)

3. Sort the animals by various attributes,  similar to the categories shown below.

 
4. Students will then choose 1 animal from each of the categories and create their own unique animal. They will then name their animal.


5. Write or verbally create a description of that animal.

The artwork for the Snabbit and Butterdog were generously created by Ali from Florida.

ARE YOU A SQUIRREL, A BEAVER, OR A LITTLE BIT OF BOTH—A SQUEAVER?
 
This activity addresses not only the skills of positively identifying our individualities, but it also provides a way to embrace those differences. It hurts when someone calls us names. By creating a unique animal based on individual preferences, and giving the animal a special name, this activity provides a gentle way to deal with teasing by others.
True Story: There was once a child that loved collecting rocks. He often came home from school with his pockets loaded with rocks of every shape, size, and color. Sadly, the boy was teased and called ‘Rocks and Minerals’. He was sad that his friends and classmates made fun of him because of his hobby. The boy had a wonderful science teacher that encouraged his passion for discovery and realized that her student was as unique as the rocks he collected.
When that boy grew up he went on a rock and fossil hunt near the Chesapeake Bay. While there, he discovered a rare type of whale fossil. That fossil, a whale from the Miocene era, now resides in a museum in Maryland.
ACTIVITY DESCRIPTION: Students will create an animal based on their personal preferences. They will then use that animal to compare with the animals created by others in the class.
Grade Range: 1-4
Time to complete: 30-45 minutes

Materials:
Animal Printouts (provided)
Crayons, markers, or colored pencils
Glue
Scissors
Paper

Instructions:
1. Prior to the activity, prepare an animal glyph based on your choices for the animal components.
Ask: Looking at the animal I created, and the key, what do you think is my favorite outdoor fun? Indoor fun? Helping fun?

Explain that the students are going to create their own animal, based on their favorite things to do.
2. Show the key to the students. Discuss the options for each category.


3. Give the animal printout and the key to the students.
 
4. Students will cut out the animal components based on their choices. They will then glue them to paper to create a unique animal

5. For the section entitled Indoor fun, instruct the students to draw their favorite item, cut it out, and add it to the paws of their animal. This addition will make their animal creations TRULY unique.
6. When the animal glyphs are completed, student will share their choices in small groups.
Hint: You can mix up the groups by having them find classmates with some similarities, some differences, or all differences. This is a wonderful opportunity to help select students for classroom chores.

OR...

*This giveaway will include a free copy of Adventures at Walnut Grove (Dana Lehman & Judy Lehman), as well as a $10 gift card for a future Amazon purchase. The registration will last from the posting of this blog post until midnight, October 7, 2013. One winner will be randomly selected from the entries. The books and treat will be shipped from Amazon within approximately 2 weeks following the close of the giveaway. The giveaway is open to residents of the United States with a United State’s mailing address. The winner’s name will be posted on the blog, unless the winner chooses not to have his/her name posted. To be considered for entry into this giveaway, the entrant’s email address must be submitted to the blog administrator.
 

This post was linked to the following blogs. Please check them out:

Mother Daughter Book Reviews dot Com

Kids Activities Blog dot Com

Living and Learning at Home dot Com

I Can Teach My Child dot Com

The Mom Maven dot Com

GIVEAWAY UPDATE 10-8-2013:

Congrats to the winners of the book and Amazon gift card: Amy, April, and William.

I will post the final winner's name when I receive confirmation from that winner.

Thank you to all of the entrants to this giveaway.


Monday, September 9, 2013

DECOMP PROJECT: My Goodness, That's a LOT of Water!

Your Decomp Project is under way and your students have adjusted to their daily trek to the classroom. Those changes are behind you. However, big changes in weather patterns are still on the horizon. In our area we have progressed from the soggy summer to the unpredictable weather patterns of the fall. In fact, since our rainfall on September 1, we have had nothing but sunny days. However, I am certain that the sun will soon be replaced with downpours and all out gully washers. With the inevitable heavy rains ahead, I thought I’d take this opportunity to provide the first of my connection activities to accompany the Decomp Project.(Link)

On those days where your area can easily receive 2 or 3 inches of rain in a 24 hour period, you might begin to wonder how on earth your little ones are going to manage to get all of that water into the decomp tub without spilling it. During the setup you placed the lid under the tub to catch the water run off. This is the time to remind you to regularly empty that lid, so that you do not end up with a muddy mess on your classroom floor.
Hint: If a huge autumn storm is predicted in your area, I recommend that you move the decomp tub to an outdoor location until the rain has stopped. Make sure it is placed where the drainage holes can do their job!

Now, back to the activity—an efficient way to make ‘rain’ fall on your decomp tub that is paired with a math connection.

Adults and children know that a gallon is bigger than a cup. How many times have your little ones tried to pick up a full gallon of milk only to find out it’s a bit more than they can handle? With that in mind, this quick activity and visual aid can help your ‘rainfall’ days with your decomp tub run more smoothly.
MY GOODNESS THAT’S A LOT OF WATER!
While this activity is intended to be conducted as an extension to the Decomp Project, it can easily be modified to serve as a stand-alone activity.

HINT: This initial measurement activity takes a long time to complete (60-75 minutes). It can be divided into more than one session. Once this activity has been completed, it lays the groundwork for a faster and more efficient way to transfer rain water to the decomp tub.
Virginia: Math Standards of Learning: VA SOL 2.11c; 3.9b
*Common Core Connection: CCSS Math Content 3.Md.B; CCSS Math Content 4. Md.A
*The common core standards base liquid measurement in terms of liters. If you are following the Common Core  State Standards to the letter, then substitute liters for gallons. The visual aid will not apply. It may not be suitable in classrooms that strictly adhere to the metric system of measurement.

ACTIVITY DESCRIPTION: Children will use various containers to build understanding of the concept of volume. They will pour water from one container to another and draw conclusions about different units of liquid measurement. They will compare volume in forms of cups, pints, quarts, and gallons.

MATERIALS:
Decomp tub (link to set-up andmaterial list)
Additional plastic tub the same size as the decomp tub
Containers for liquid volume: cup, pint, quart, gallon
Funnel *optional
Permanent Marker
Ruler
Rain Gauge
Visual Aid Chart (provided)
Watering Can


INSTRUCTIONS:
1. Prior to conducting this activity, gather various containers that hold cups, pints, quarts, and gallons.
2. Show the containers (pint size shown) to the students.
Ask: Which container do you think holds the most amount of water? The least?
ALL CONTAINERS HOLD 1 PINT
3. Using the 1 cup measuring cup, fill each container with water. Count the number of cups required to fill each container. Explain to the students that all of these containers hold the same amount of liquid. Discuss why the containers can look different, but still hold the same amount of liquid.
4. Show an example of each of the following liquid measurement containers to the students: cup, pint, quart, and gallon. For younger students, writing the size on the container with a permanent marker is recommended. (Cup-C, Pint-P, Quart-Q, Gallon-G)
**5. Mark the inside of the tub with permanent marker to indicate inches of rain (half inch increments for second and third grade).
**6. After the rain falls in your area, bring the rain gauge into the classroom. Show the gauge to the students and discuss how much rain had fallen. For grades K-1, estimate to the nearest inch. For grades 2-3, estimate to the nearest half inch.

**7. Fill the large tub with water to match the level of water in the rain gauge.

7. (Stand Alone Activity Step) Fill the plastic container approximately half way with water.
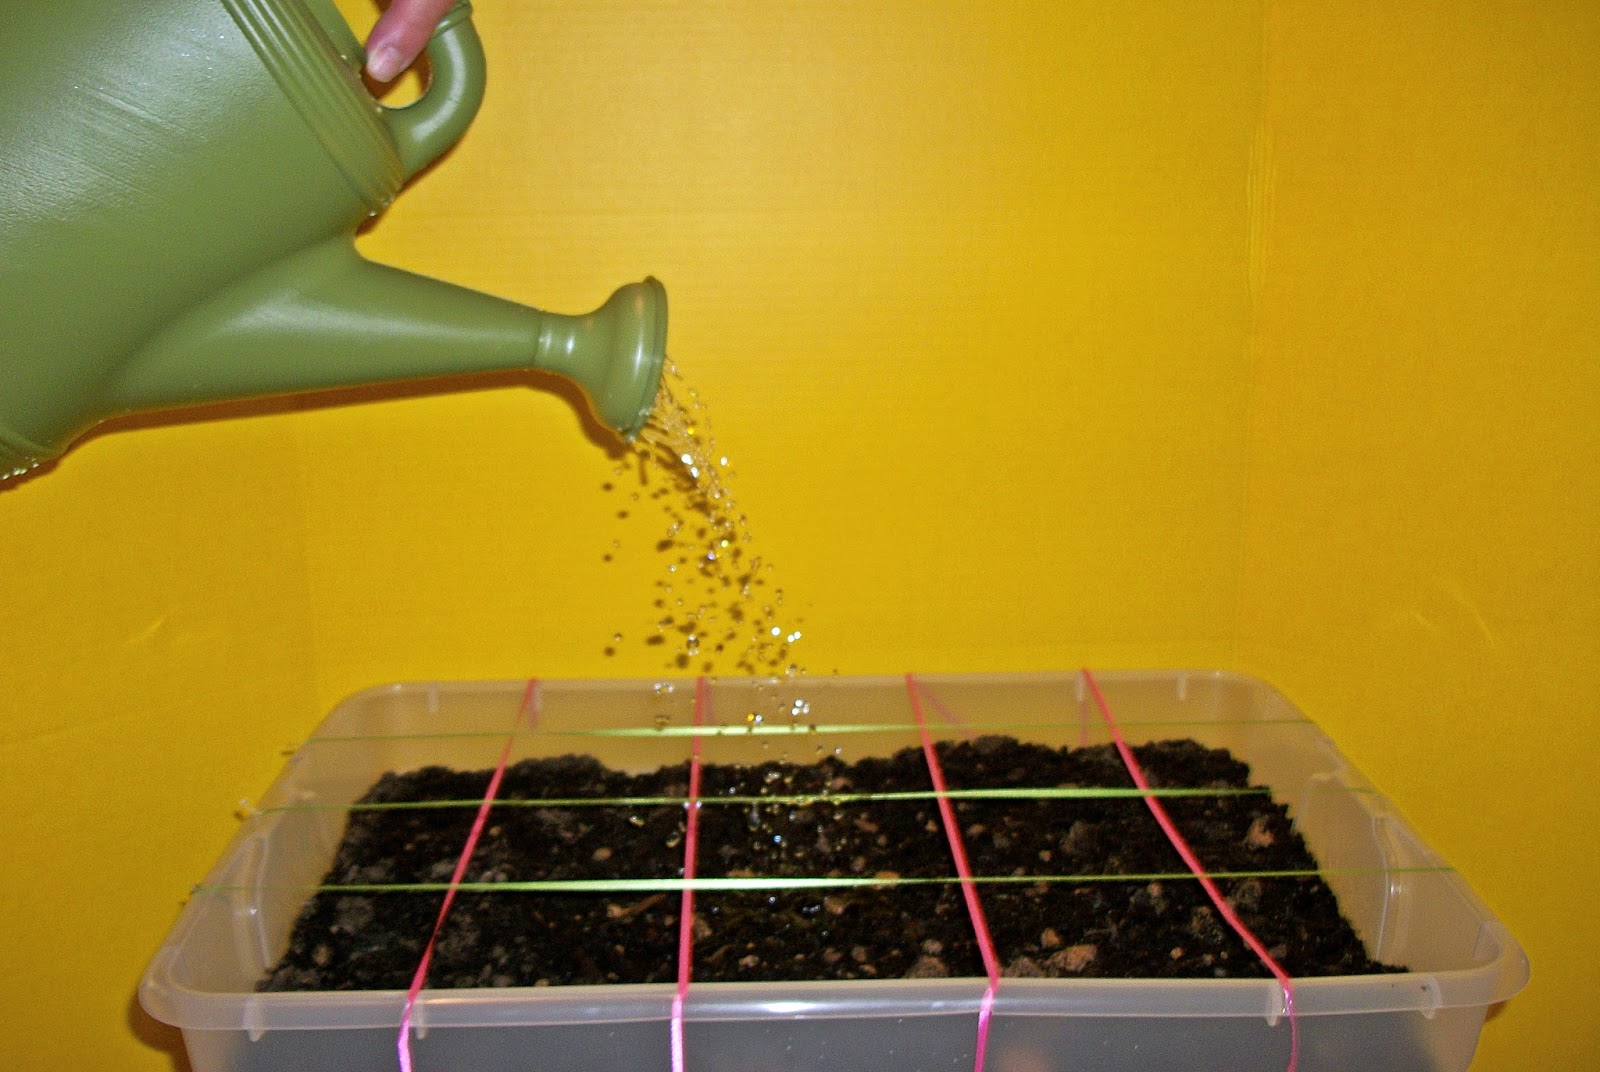
**8. Using the cup-sized measuring cup, take turns filling the watering can with water, counting the number of cups it takes to fill the can. This step does not need to be completed until the can is full. The intent of this step is to show that it takes MANY cups to fill the can.

Ask: Which container do you think would be a faster one to use to fill the watering can? Why?
**9. This is the opportunity to assist students with making connections between container sizes as well as provide an easier way to ‘water’ the decomp tub.. Suggest that while the gallon container provides challenges, it might be the fastest way to get the water from the rain tub to the decomp tub. First, the students must determine how many gallons it takes to reach the level of water from the rainfall.

10. Take turns using the cup-sized measuring cup to fill the gallon container, scooping the water from the plastic tub. Count the number of cups necessary to do so (16). Repeat this process until the plastic tub is empty. If the gallon container is not full at the end, use the visual aid to determine how much of the gallon container is actually filled.
 
**11. Each time the gallon container is filled, the teacher or parent can use that to fill the watering can. Sprinkle the watering can over the decomp tub.
 
**12. In the future, before adding the rainwater to the decomp tub, use the markings on the plastic tub to determine how many gallons and cups of water are needed. For example, with the tub used in this demonstration, it took 2 gallons and 3 cups to equal 1 1/2 inches of rain water.

1.5” of rain= 2 gallons 3 cups
**Steps with the double asterisk are intended to be used with the Decomp Project. If your students are conducting this activity as a stand-alone activity, you may omit these steps.

More Math Measurement: This activity will provide countless math extension opportunities. Track how many cups, pints, quarts or gallons of rain are poured onto your decomp tub. By the time yearly educational assessments roll around, your students will have mastered the related math objectives and had lots of fun while do so.
Check this blog frequently for additional activities to add to your Decomp Project.

This post is shared on the following blogs. Please check out their terrific ideas:

The Educators Spin on It


Saturday, June 8, 2013

TROPICAL STORM ANDREA IS GONE, TIME FOR A RAINBOW

We are lucky enough to have rainbows form in our back yard quite often.
The hurricane season is officially here on the east coast with an early start from Tropical Storm Andrea. Yesterday was definitely not a day to head outdoors. Today, however, is a different story. The clouds are thinning and the sun is slowly forcing its way through the heavy gray haze—the perfect recipe for a rainbow.

Today I am posting an easy way for your kids to make their own rainbow—no rain required. So, head outdoors, grab the hose, and have some wet summer fun.

HOW CAN YOU MAKE YOUR OWN RAINBOW?

Time to complete: 20-30 minutes
Ages: Anyone can enjoy this activity 

Materials:
Garden hose with an adjustable nozzle attached
Photographs of naturally occurring rainbows
Picture of a right triangle or angle
Open space outside
Sunshine (the sun should NOT be directly above you)
Instructions:

1. Show the children images of naturally occurring rainbows (single and double rainbows).
Ask: What colors do you see in the rainbows? How do you think these rainbows are created? Look closely at the double rainbows. How are they different?
2. Show children the picture of a right triangle.
3. Demonstration:
            a. Position yourself with the sun directly behind you so that you and your shadow form the legs of a right triangle, as shown.
            b. Position the hose approximately halfway between your shadow and you. The actual angle is 42 degrees for the primary rainbow and 50 degrees for the secondary rainbow. However, using the phrase halfway will be easier for the children to understand.
            c. Have a child turn the water on FULL blast. Arc the hose spray to create the rainbow. The rainbow should be formed close to the halfway point between the legs of the triangle.
Ask: What colors do you see in the rainbow? What color is at the top? At the bottom?
4. Have the children take turns creating their own rainbows. It may be possible to create a double rainbow in this manner, but the secondary rainbow will be faint.
 
Conclusion:
To create a rainbow you need a source of light and something that will refract and reflect the light. The light from the sun is refracted (bent) and reflected (bounced) inside the droplets of water from the hose. As each color of the rainbow has a different wavelength, the way they are refracted and reflected causes the sunlight to split into the different stripes of the rainbow.


RAINBOW fact: Double rainbows are actually mirrored rainbows. The primary rainbow is on the bottom with the spectrum colors beginning with the red stripe. The secondary rainbow begins with the violet stripe and is not as bright as the primary rainbow.
There are many ways to create a rainbow—using CDs, water, water and oil, and many more. Try your own hand at creating rainbows.