Thursday, May 29, 2014

A Blog's Anniversary When Life is Just Ducky


One year. Wow! It is quite difficult to believe that a year has passed since I posted my first blog entry. Throughout that year, my blog has served as a reflection of my hectic schedule. When life had been just ducky, my blog posts were frequent and overflowing with activities. However, as I am sure you are aware, spare time is a fluid entity—Some months I had enough, some months, well, not so much. It seems as if my spare time since the end of January has disappeared along with the frigid temps of the winter. Therefore, my blog posts have become less frequent.
Last week, however, I did manage to devote some time to an afternoon of fun with a friend by visiting a 40 foot tall (YES, I did say 40 foot tall) rubber duck that casually bobbed up and down in the Hague in front of the Chrysler Museum in Norfolk, Virginia. My friend and I were not alone. There was a school group, a gathering of locals, curious out-of-towners, even a group of folks dressed up like the Statue of Liberty—all with cameras in hand.

Up until then, I had some trouble coming up with a special topic for my 1 year anniversary blog post. When I saw the giant rubber duck, however, my problem was solved. After all, who doesn’t love a rubber duck?!
First, a little background on the giant rubber duck—
The giant 40 foot rubber duck was created by the talented and outside-the-box pioneer Florentijn Hofman. He crafted his piece of whimsy in 2007. Since its first appearance in the Netherlands (Hofman’s home), the duck has traveled the world. To date, the duck has only appeared in 2 U.S. cities—Pittsburgh, PA and Norfolk, VA.
Hofman’s creation depicts our connection to each other (After all, ducks do float on water—which flows from city to city, country to country, and continent to continent) as well as inspires a sense of joy and return to childhood.
So, as Hofman intended, I decided that it’s time for some rubber ducky fun!
Given the enormous size of the duck, I decided to create an activity that focuses on size comparison. Rubber ducks in various sizes can be used to compare sizes, discover and discuss the concept of water displacement, and discover and discuss the buoyancy of an object (i.e. A duck filled with air should float. What will a duck filled with water do?)
A Rubber Duck CAN Float—But What If It Doesn’t? 
 
This easy-to-complete activity demonstrates the concept of buoyancy and water displacement as a way of identifying the volume of an irregularly shaped object.
 
Materials Needed:
Rubber ducks in various sizes
A bowl large enough to cover the largest duck with water
Water
A crayon or wax marker
Tape
Printout of ducks
2 water balloons—one filled with water, one filled with air
Adhesive dots
 

Directions:
1. Show the ducks to the children. Discuss how they are different (size, shape, etc.).
2. Place the ducks in order from smallest to largest.
3. Place a piece of tape to cover any holes in the ducks to keep water from seeping inside when they are immersed in water.

4. Add water to the bowl, leaving at least 1 inch unfilled.
5. Use the crayon or wax marker to mark the water line on the bowl.

6. Beginning with the smallest duck, hold the duck upside down and push it into the water. Observe how the water level changes. If possible, use the crayon to mark the level of water on the side of the bowl.

Hint: for the smallest duck, there will be little observable change.
7. Repeat for each duck, marking the side of the bowl when each duck is immersed in the water.
8. Discuss why it was hard to see the change in the water level when the small duck was under the water, but much easier to see the change when the large duck was under the water.
9. Show the picture of Florentijn Hofman’s duck to the children. Discuss how much water would be displaced (spilled) if that duck was pushed into the water. (See Link Above)
10. Discuss why the ducks had to be pushed into the water (The ducks are filled with air). Use the 2 water balloons to demonstrate by placing them into the bowl of water. The balloon filled with air will float. The balloon filled with water will sink.

Follow-up FUN:
Use the printout of the ducks to demonstrate the concepts of area and size comparison. Use the dot stickers to cover the ducks as much as possible without overlapping the dots. Count how many dots it takes to cover each duck. Discuss how many dots it would take to cover Hofman’s duck.


Use your imagination and create an afternoon of learning fun with your little ones—rubber ducky style!
 

In celebration of the first anniversary of my blog, I’m hosting a very special giveaway. This giveaway includes a numbered and signed rubber duck designed by Florentijn Hofman and a $20.00 Amazon gift card to purchase your own set of ducks (The other ducks pictured came from Amazon) or any other treat that you could use for some fun activities with the kiddos.

*This giveaway will include a signed and numbered souvenir rubber duck (a $22.00 value) from the Chrysler Museum and a $20.00 Amazon gift card sent via email to the winner. The registration will last from the posting of this blog post until midnight, June 13, 2014. One winner will be randomly selected from all entries. The rubber duck and gift card will be shipped within approximately 2 weeks following the close of the giveaway. The giveaway is open ONLY to residents of the United States with a United State’s mailing address. The winner’s name will be posted on the blog, unless the winner chooses not to have his/her name posted.

To enter the contest the entrant must post a comment on this blog as well as submit an email address through the contact link on the blog’s home page. The winner will be contacted via email at the close of this giveaway. The winner of the contest must reply to the contact within 72 hours. An alternate winner will be selected in the event that the initial winner does not respond within the 72 hour time frame.


This blog post has been shared on the following blogs. Please check them out.


The Squishable Baby dot Com


Lovely Commotion dot Com


Giveaway Update


Congratulations to Lisa for winning the giveaway in celebration of the one year anniversary of this blog.


Wednesday, May 14, 2014

Fancy Schmancy Words-Embrace or Avoid as Children's Book Week Continues

Fancy Schmancy Words—Embrace or Avoid?

When choosing books for the younger readers in your life, how do you select the reading material? Do you choose books with a formula based on phonetic patterns? Do you seek books with that utilize mainly CVC and leveled high frequency words? Or, do you embrace books that have words that are a bit edgy, unfamiliar, and describe outside-the-box concepts?

Tyrannosaurus
Pinkalicious
Transformers
All of the words listed above qualify as words that are NOT high frequency words or the typical CVC words that often come to mind when choosing early reading material. They contain difficult letter combinations, are unique, and contain multiple syllables. Yet, many if not most children in their early stages of reading can probably tell you what those words are—in or out of context. So begins the debate. Is a phonetic approach to reading best or should children be presented with reading material that focuses on use of context and picture clues? In reality, the best approach may be a combined approach. Debates will always continue on this subject. However, remember that in order to raise avid readers that can devour books as fast as they devour a slice of watermelon on a hot summer day—we must encourage budding readers to expand their reading vocabulary by presenting material that includes words that POP off of the pages.
 
 
When my oldest son was a mere toddler, he would sit for hours listening to and ‘reading’ stories that contained what I refer to as Fancy Schmancy words—words that bring a story to life, with or without the illustrations. Stories that have these types of words sprinkled across the pages are the stories that kids remember. (Dr. Seuss, what is a vug anyway? J)
For example, which sentence is more interesting?
When the balloon popped, the children ran away in different directions.
OR
When the balloon burst, the children scattered.
The second sentence is shorter, but paints a more vivid picture for the reader—no illustration required.
If your child selects a book with words that are unfamiliar, there are many ways to help your child add that word to their reading vocabulary.
1. After you finish the book with your child, go on a fancy schmancy word scavenger hunt to identify new and interesting words.
2. Act out the words that you and your child have identified. Example: Once a child sees a dripping, runny, scoop of ice cream plop onto a hot sidewalk, they will definitely remember the meaning of that word.
3. After your child acts out the words, have your child tell another child what that word means, in their own words. Learning the formal definition  of a word is much different than attaching a personal meaning to that word.
4. Illustrate the new words. This activity not only helps the child locate a word in text, but also taps into his or her imagination as well as practice fine motor skills.
Below are some examples of attaching a visual meaning to an unfamiliar word.


So, as Children’s Book Week (May 12-18) continues, please remember to select books that will be fun, memorable, and stretch the vocabulary of the young readers in your life.
For the record, I’d choose Fancy Schmancy.

Sunday, May 11, 2014

CHILDREN'S BOOK WEEK~ Celebrating Children's Literacy

Happy Children’s Book Week!
(May 12-18, 2014)
The countdown to Children’s Book Week is nearing its final hours. Excitement is building.
One of the longest running efforts to encourage and promote children’s literacy, Children’s Book Week is eagerly anticipated by children, parents, grandparents, aunts, uncles—you name it. Since it’s first week in 1919, Children’s Book Week has reminded us that a nation of readers is a nation that will continue to move forward.

Click this link to see if your area is holding any special events for this important week that shines a light on children's literacy.

In celebration of this event, I am adding a quick recap of some reviews posted over the past year of some fantastic examples of children’s literature. Each title will take you to a link of that post—a year in books, as it were.

It’s a Firefly Night by Dianne Ochiltree

My Father is Taller than a Tree by Joseph Bruchac

When a Dragon Moves In by Jodi Moore

Adventures at Walnut Grove by Dana Lehman

Pumpkin Circle by George Levenson

Welcome Comfort by Patricia Polacco

Quiet Bunny’s Many Colors by Lisa McCue

In addition to this, my ebooks that are currently available on Amazon are available as a free download on Monday, May 12 and Tuesday, May 13.

When Violet was Blue—for children ages 3 through 6

Sometimes Snow Falls in the Summer—for children ages 5 through 8

So, instead of reading a lengthy blog post, grab a good children’s book (or 2 or 3), find a comfy spot to sit with your children and—Read, Read. Read!

Thursday, May 1, 2014

Yay for Spring! GARDEN SONG / PETE SEEGER


Yay!
The APRIL
showers have brought the May flowers!
Take
some time this week to stop and smell the flowers~ALL of them!


Thursday, April 3, 2014

Spring, Bunnies, Rainbows, & Easter~What Could Be Better?

I can happily report that spring has definitely arrived on the mid-Atlantic coast. Signs of spring are everywhere—from the bluebirds that are busily creating their nests, to the flowers popping up from the still-frosty ground, to the trees that look as if their branches are ready to burst. Spring is my favorite season, ushering in the opportunities to renew just about everything.

For Quiet Bunny, the adorable creation by Lisa McCue, the same is true. Quiet Bunny loves spring. And, as Easter falls this month, I decided to offer a review of Quiet Bunny’s Many Colors—a book perfect for spring AND Easter!
QUIET BUNNY’S MANY COLORS by Lisa McCue
From yellow to green and from blue to red—Quiet Bunny loves all of the colors of spring. Yet, poor Quiet Bunny becomes sad when he thinks that his brown and white fur is not a color of the season that he loves so much.

Quiet Bunny sets out on a mission to become one-with-spring by adorning himself with nature’s offerings of the season.
He tries dandelions.
He tries lily pads.
Quiet Bunny even tries a good coating of red clay.
Nothing works.

Just about the time that Quiet Bunny is ready to give up a wise owl steps in and helps Quiet Bunny realize that he is indeed the color of spring!
In Quiet Bunny’s Many Colors, Lisa McCue, author and illustrator, presents a heartwarming tale of acceptance of oneself. With vivid splashes of color, McCue’s illustrations will definitely create a lasting memory of this very important message. Her clever way of transitioning from one event to the next also provides an opportunity to discuss sequencing and story plots.
As an added bonus, McCue tucks little surprises on each brightly colored two page spread that will encourage children to explore the world around them. Children will delight in finding each plant and animal that represents the color that Quiet Bunny is attempting to mimic.

Bunnies, nature, bright colors, and acceptance of our many differences—Quiet Bunny’s Many Colors is the perfect way to usher in the season of new beginnings.

Word Count: 609
Average words per page: 20
Recommended Age: 3-6-years-old

Added bonus: Great for color recognition, identifying items from nature, and lessons on acceptance, FABULOUS illustrations!


Click here for a link to Lisa McCue's story-Quiet Bunny's Many Colors


Fun Printables to Teach Color Recognition and Sequencing


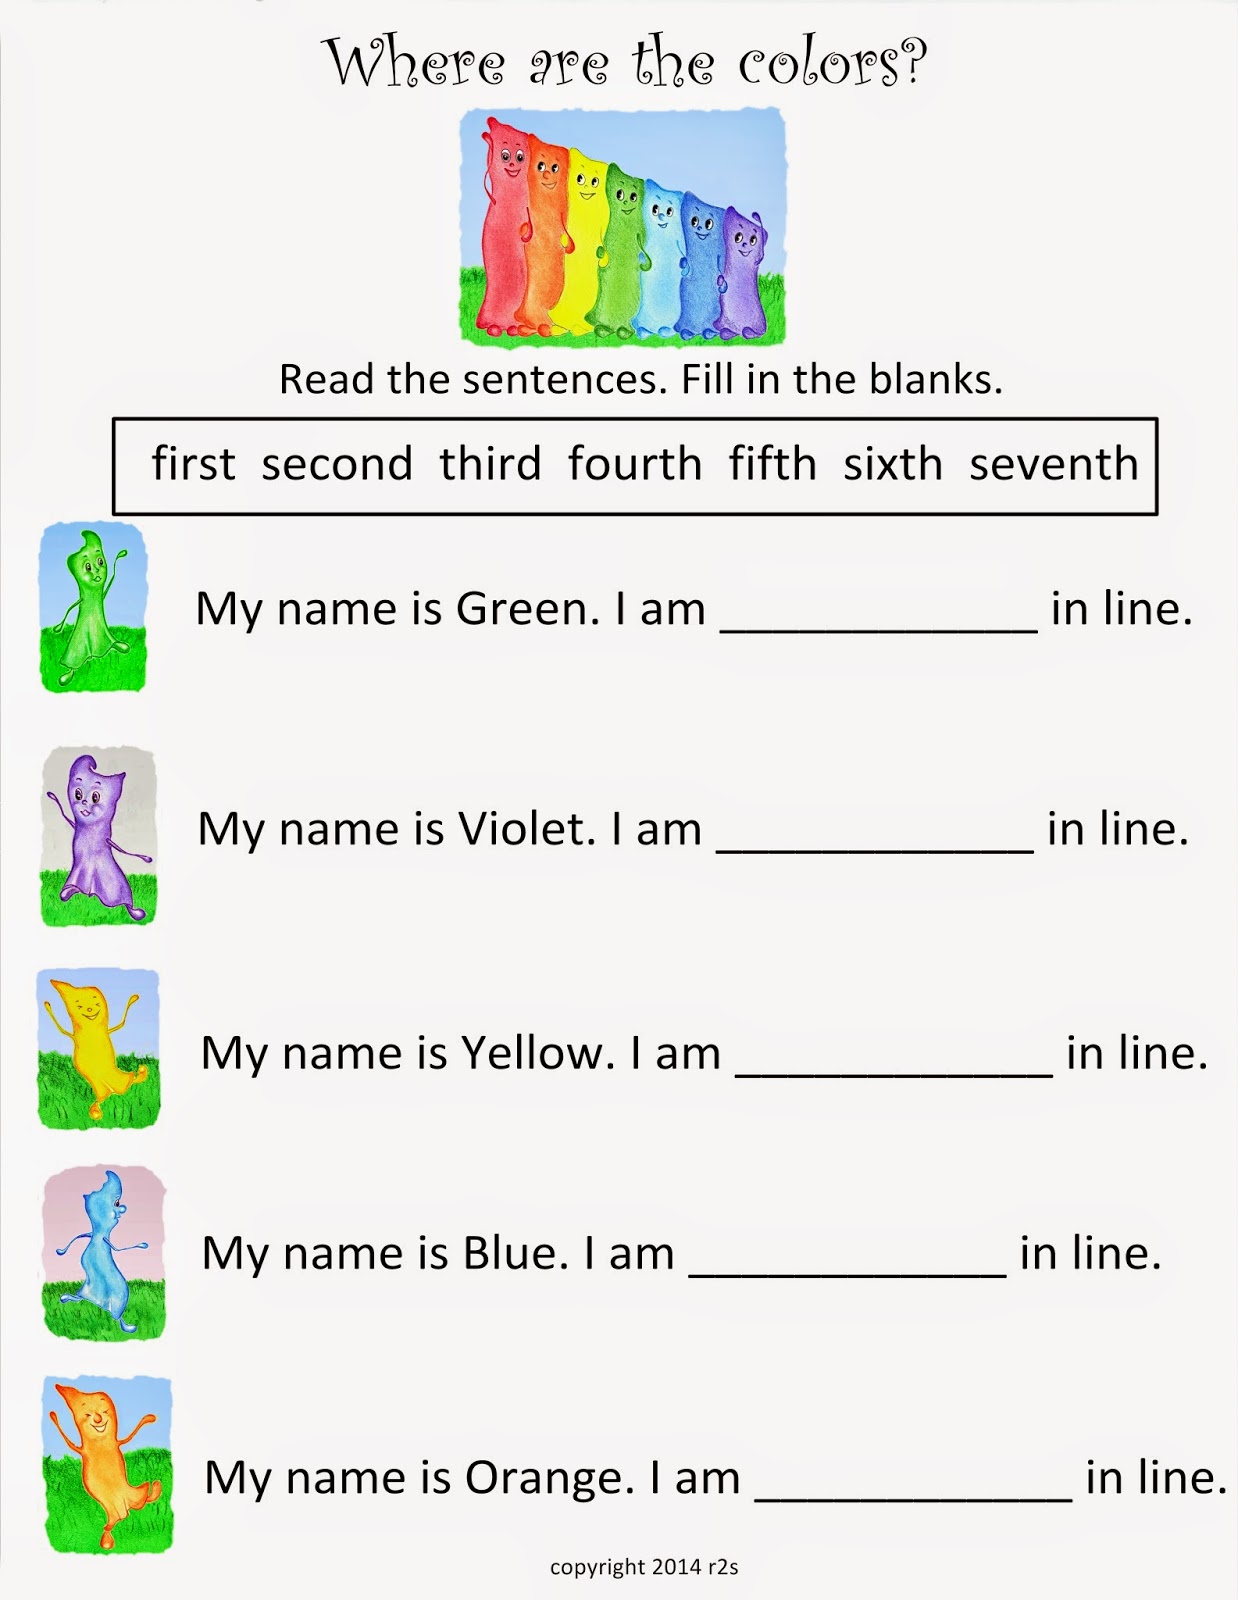
If you are seeking additional resources to teach and reinforce color recognition, my newest book When Violet was Blue, available as an ebook on Amazon can easily fit the bill. The simple drawings and bouncy tale will help your little ones learn and remember the colors of the rainbow.
The image below will lead you to a link of the ebook. This book even features the text-to-speech option so that your little ones can ‘read’ the story all by themselves.
 
http://www.amazon.com/When-Violet-Was-Blue-Troehler-ebook/dp/B00JAN76PK/ref=sr_1_1?ie=UTF8&qid=1396529609&sr=8-1&keywords=when+violet+was+blue
Link to ebook on Amazon


Monday, March 10, 2014

RAINBOW Fun for St. Patrick's Day

Here on the east coast, the winter has definitely been long. Students in our area missed nearly 3 weeks of school due to snow, ice, wind—you name it. That’s why I am especially looking forward to St. Patrick’s Day this year. The holiday doesn’t always attract much attention. However, with the sea of green from a St. Patty's Parade and the rainbows that signal the end of a storm, St. Patrick’s Day seems to be the perfect holiday to usher in a spring-thinking state of mind.

The post for today deals with the wonders of a rainbow and a quick list of activities that you can use to reinforce math skills as well as color identification.
So, print the printables and have some rainbow fun.

RAINBOW STICKS
This printable is great for teaching color concepts, ordering of sizes, and non-standard measurement (How many red strips long is the table?)

Suggestion: Print the color sticks on card stock. If you decide to use these to teach fact families, cut off the white end of each stick.
RAINBOW BRICK COUNTING STICKS
 
This printable is great for teaching addition basic facts, comparisons, and matching.
Suggestion: Print the color sticks on card stock. If you decide to use these to teach fact families, cut off the white end of each stick to more easily align each stick.

RAINBOW ADDITION
 
Create your own rainbow with pipe cleaners or wax-coated yarn to demonstrate differences in diameter.


If you are looking for a fun story that teaches colors, positional words, and the concept of teamwork to the kiddos, check out the link below to my latest story for children ages 3 through 6.


http://www.amazon.com/When-Violet-was-Blue-Troehler/dp/149612958X/ref=sr_1_1?ie=UTF8&qid=1398776065&sr=8-1&keywords=when+violet+was+blue
Link to Book and eBook on Amazon.com

Most importantly, have some RAINBOW FUN.
Happy St. Patrick’s Day!

This post was shared on the following blog. Please check them out:

The Kennedy Adventures dot Com


Monday, February 10, 2014

How Can You Teach RATIOs with Snow?

Winter definitely continues to grasp many areas of North America. And, just like my family, I am certain that your family is eager for blustery spring winds to blow away those pesky snow clouds.
Hopefully, it won’t be too long before the light and fluffy snowflakes will be replaced by an ample supply of raindrops—the perfect way to wash away the gray of winter.
This anticipation of spring is a great opportunity to provide not only a science lesson but also a fun way to demonstrate the concept of ratios. By using the relationship between snowflake density and raindrop density (i.e. the Snow Water Equivalent), the kiddos can practice using ratios, skip counting, and multiplication.
Why not go outside, scoop up a bucket of fresh fallen snow, and have some winter-spring transition fun.
HOW CAN WE USE THE SNOW WATER EQUIVALENT TO TEACH RATIOS?
“IT’S A RATIO.”
“HORATIO WHO?”
Every time I hear the term ratio, I recall the scene where Opie and Andy Taylor discuss ratios. Opie, most likely in the first grade, does not understand the term. In fact, many children in K-2 have difficulty grasping the concept. Add this confusion to the concept of comparing snowfall amounts with rainfall amounts, and you have a recipe for a flood of misunderstanding.
This activity addresses both concepts in a fun yet scientific manner. Finish it off with a snow cone treat and your children are bound to forever remember that it takes a lot of snow to equal an inch of rainfall!
ACTIVITY DESCRIPTION: Children will observe changes in density by melting snow. They will then use the melted snow to determine the ratio of rain to snow. Children will use that information to predict how much rainfall there would be if their area received rain instead of snow.
MATERIALS:
Fresh snow (or shaved ice if no snow is available-results will vary)
Clear plastic cup
Clock and timer
Printouts of raindrops and snowflakes
Camera (optional)
INSTRUCTIONS:
1. Prior to the activity, fill the plastic cup with either snow or shaved ice. Show the cup to your children.
 
 
Explain that when snow melts into water, the density (a measure of how compact an object is) will change.
Ask: When this snow melts, how much water will there be in the cup?
2. Place the cup on flat surface and take a photo of it.
3. Record the time that the observation begins and set the timer for 30 minutes.
4. When 30 minutes have passed, look at the snow and record any changes. Take a photo. Set the timer for 30 minutes.
 
 
5. Repeat step 4 until the snow has melted.
6. When the snow is melted compare the children’s predictions with the actual amount of liquid in the cup.
Ask: How long did it take for the snow to melt? Why is there less spaced filled in the cup? What could change the rate of melting? (Ex: placing the cup in the sun, in front of a fan, etc.)
EXPLANATION:
When snowflakes combine with other snowflakes, there is air between each one. When the snowflakes melt, air is released, causing the water contained in the snowflakes to take up less space. The snow and the liquid have the same mass (stuff), but have different density.
 
7. Use the printouts of the snowflakes and raindrops to represent the ratio of inches of snow to the corresponding inches of rain, as shown.


8. Discuss the differences that could happen if the snowfall fell on a different day. For example, when temperatures rise, snowflakes have a greater density. Therefore, the ratio of snowfall to rainfall would change.
9. Complete the lesson by making snow cones. Remind the children that while their snow cone cups may appear full, there is very little water inside.
EXTENSION ACTIVITIES:
1. Completion of the snow melting portion of this activity provides an opportunity to reinforce telling time to the hour and half hour. Children in K-1 can use the photographs created by the experiment to sequence the melting process and matching the corresponding time to the correct image.
2. This lesson also provides and excellent opportunity to practice skip counting and multiplication. Print multiple copies of the raindrop and snowflake printables to use with both concepts. It is also possible to begin basic algebra concepts by replacing the snowflake with S and the raindrop with R.